I love to play and I love using chalks. In the past I only used pastel chalks but one day I discovered in a clearance aisle a box of blending chalks. I decided to splurge and have never regretted it.
I will use just the chalk pastels in this project. However, I wanted to show you the blending chalks and some of the tools I use with them. If you use Q-tips make sure they are ones with tight buds. I also use eye shadow applicators and using cosmetic pads you can get some interesting designs. In a future post I'll show you some of the things you can do with blending chalks.
I have cut some 4" strips. The width doesn't matter. The only reason I made mine the size they were was so I could fit them on the page with a printed image and shape.Remember you can use these strips on other projects so don't throw them away when you are through. I have also cut out a rectangle which I will be transferring the chalk from the strips onto.
Now the fun begins. The hardest things for me is deciding what colors of pastel chalk I am going to use. The card base is a bright yellow and a printed background is a soft green. I have been having winter weather lately so I am ready for something Spring looking. If you decide to do this remember that the colors are going to be lighter than they are on the strip.
O.K. now for some pictures of what I did. LOL! I was taking the pictures myself while I worked. Not the easiest thing. If you don't want to get your fingers dirty you can use a cotton ball. I wiped my hands off as I changed colors. I also rechalked the strips if they were too light.
First color your strips with chalk. The heavier you chalk it the better.
I tore an edge off of one of the long sides of the strip. You can keep it straight,or use decorative scissors. It depends on what effect you are after.
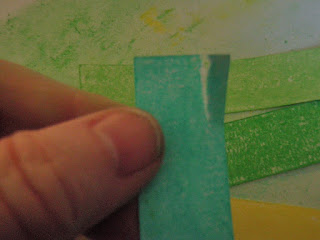
To keep the strip from moving I actually held it down with my thumb and finger from my left hand. onto the piece of paper I was transferring the chalk to. However in this picture I had the camera in my left hand. I took my finger and starting at the top of the strip pulled my finger towards me. How far down you go on the paper you are transferring to is up to you.
This is what the finished paper looked like. I did it on the diagonal as this is going to go on the card so it is a diamond. Surrounding the paper is the strips I used which will go on a card in the future.
When I was playing in Studio I forgot to change the color of the cut line for the image and turn off print lines so it printed red and because it was a thicker line alas the red shows. I decided to see if my faux sculpted paper would cut with a flower die I won last year. Not only did it cut but also my punch worked cutting it. The tutorial for making the paper is here:
Here is the card I made.
I edged the chalk paper with copper ink pad. I was disappointed with the green paper the flower is on. Although I had the pattern set at scale 500% it does not really show up. I edged that with Peeled Paint ink pad. (the angle of your paper to the pad as you drag it through the pad will determine how thick or thin your edging is.)
I edged the flower petals with a gold paint marker. I would pounce the pen up and down to get a glob of ink on paper and then use a artist brush. since I don't have any gold ink. I wanted to cover up the white gesso that showed on the cut edge as the foil separated a little bit. Because of the foil backing it was easy to mold the flower petals until I had something I was satisfied with. The bead in the middle I have had for a little over a couple of decades. LOL! Let's just say my son was eating baby food and leave it at that. I glued a rhinestone over the hole.
I hope my hairdresser will love her unique card. I had lots of fun making it and now that I know that the sculpted paper will cut with a die will be having fun making more paper.
I hope you will play around with chalk. There are so many wonderful things you can do using this technique. Including using it to color an image.
Thank you for stopping by and do come back as I am working on a couple of "Trash To Treasure" cards. Yes, there is another challenge going on at the Silhouette Plus forum. This time to use something recycled or something you normally would not use.
Have a GREAT crafting week!


Love it Myoriah! I an now anxious to dig out my chalks, thanks to your inspiration!
ReplyDeleteNow where did I put those chalks?
ReplyDelete