Tuesday, December 31, 2013

Last Experiment Of The Year

Hi everyone for some of you it is already the New Year. For me that ball has not descended down yet. Anyway I thought I would do one more experiment before the year ended so I would feel like I kept my goal of trying new things this year.

My friend gave me for Christmas this postcard stamp I fell in love with. In fact he bought me everything I had put on a wishlist for him. Unfortunately except for the  Stampendous Snow Postcard stamp his order did not arrive until after he had left home to visit me. Which means that my Christmas will be extended with more presents to open. :-)

It was hard to get a good photo of the full card since the stamp is stamped on plastic. I used plastic from a page protector and stamped on it with Stazon Rusty Brown ink. The instructions for this technique had you using printable transparencies and black Stazon ink. I did not want to use my printable transparencies as they are more expensive. I've found page protectors at a dollar store for something like 10 cents a piece. I have not yet broken down and bought black Stazon ink. The Rusty Brown I had bought at a craft yard sale. Wish this area had more of those.

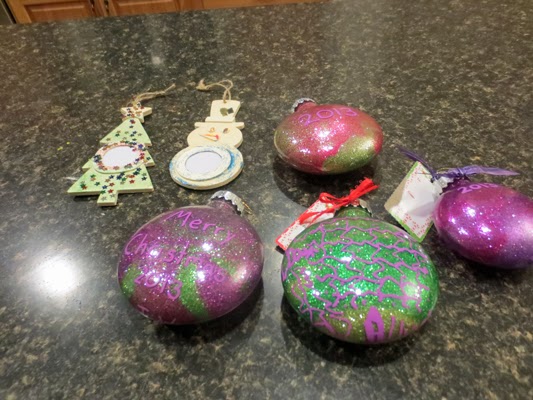
It was unbelievable to me the detail that showed up when I stamped on the plastic. I cut my plastic larger than the stamped image so I would not mess it up with the next part of the technique. When the ink is dry turn over the plastic and brush liquid floor wax on the plastic. (I have to use that liquid floor wax up some way since I bought it to make ornaments and a lot is left. Who wants to be waxing floors when they can be crafting.) Then lightly sprinkle fine glitter. If you sprinkle the glitter too heavily the next step will not work. (I wish I would have had a clear or white fine glitter but I don't so I used a greenish gold.)
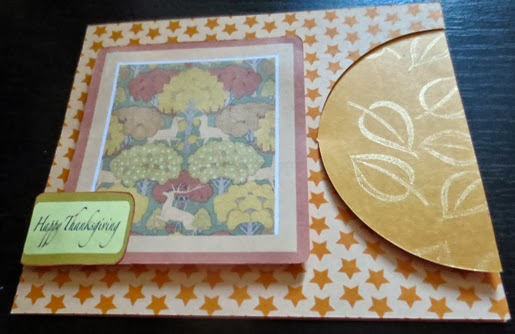
(Sorry about the shadow and glare. I was trying to show how beautiful this is with the glitter. It was impossible for me to get a picture to show you the beauty of this card.)

 Next place a crumpled sheet of tissue paper over the glittered plastic. (I was so excited to try this technique I forgot to crumple the tissue.) Then take a brush and stipple floor wax on to coat the tissue paper. The floor wax works as a glue. To make sure that the tissue paper was down tight I went ahead and carefully rubbed my brayer over being careful to not tear the tissue paper. If you do tear the paper you can patch with a piece of tissue paper and floor wax. If your patch shows it will add a vintage look.
I was going to leave my project at this point but after it had dried and I placed it on top of card stock to see how it was going to look I decided to add color. Normally this next step you would do before the wax was dried. If you decide to do it after you will need to coat with floor wax. Then color with inks or acrylic paints. I used Folk Art metallic Sapphire and green from my set of metallic paints. Dab the paint or ink randomly and then use a brush with more floor wax to blend your coloring media. Take another piece of tissue paper or a paper towel and blot. If you blot with another piece of tissue paper you can use that in another project. :-)

 I decided to paint a gold border on my card base before adhering my stamped image. Painting the border on the card base instead of on the plastic gives a softer look. The floor wax on the tissue paper makes it more transparent so anything under the image will show through.

I adhered my image using clear Zots by Therm O Web. You could use double sided tape or whatever you use to adhere vellum which doesn't show.

What do you think? Would you try this technique? I am pretty sure if you don't have floor wax that a thinned glue which dries clear would work.

Are you making any crafting goals for the New Year? I will make once again the goal to try new things. I want to grow not only as a crafter but also as an artist. The big goal will be to organize my supplies so I can easily find things. I will continue to use what I have on hand and try to not buy more crafting supplies unless it is glue or solid color card stock.

Wishing you a Blessed New Year and Happy Frugal Crafting till we meet again!

Sunday, December 29, 2013

Favorite Saying Card

Hi everyone! I hope that you had a good holiday with friends and loved one. I shared mine with a good friend and we had lots of fun including one day of eagle watching.

While my friend was visiting he had to go into the big city so we of course stopped at a craft store while we were in the city. I found on sale a stamp with my favorite saying by Stampabilities. Of course I had to buy it as well as a wood-grain embossing folder which I wanted after I saw a card that my friend Alice Golden had made using a wood-grain embossing folder. While at the store Kraft cardstock was on sale. Believe it or not I did not have one piece of Kraft cardstock. This is the card I made today.


I wish the blank card was heavier. I had to glue another blank card base on the inside to make the card sturdier. I'm trying to use up these blank cards which I accidentally bought a few years ago.

The card base was embossed using an embossing folder by Paper Studio. I used a brown ink on the folder. In person it really does look more like wood grain.

I used my Fiskar edging ruler to tear the edge on the Kraft cardstock. Because the cardstock is so heavy I got a distressed look to the edges. I stamped with my Caterpillar/butterfly saying stamp with black tuxedo ink by Memento. Then I colored the butterflies with some cheap washable fine tip markers I bought at a dollar store.

For those who are interested here is a movie I made while watching eagles with my cheap camera. I lost the eagle while recording when he flew right over me.  It was a thrilling experience to see the Bald Eagles so close. I learned that the area where we saw the eagles also has other birds in the area. I can't wait to go exploring next year.  It is moments like this which brings a richness to life.

Another year is almost over. I wish for you and yours a Happy New Year. May it be filled with all the best that life has to offer. 

Thanks for stopping by. Wishing you Happy Frugal Crafting till we meet again!

Sunday, December 22, 2013

It Is Beginning To Look Like Christmas

Can you believe that Christmas is almost here. I hope you are getting done everything you want to get done. This is the last of my Christmas crafts. Grab yourself a cup of coffee or tea and relax for a few minutes.
After making a bunch of the circle paper ornaments I decided to try the same technique with different shapes. I'm thinking it might be fun to make a heart shaped ornament this way for Valentine's.

 Shhh! Don't tell anyone but when I resized I made the lid too small so it fits inside the box. I think though I like the clean looks of it.  Cut my tree out and painted and added gems for an embellishment. Just happened to find the star shape gem in my stash in pink.
Star shaped ornament painted and trimmed with glitter. Even glittered the ribbon. Card behind was in my stash from last year.


The last card of the season. The stamp is Hero Arts Joy To The World Angel stamp. Not sure it is still being made but was fun to bring out a stamp from the 90's. Image colored with pencils.

The inside of the card. I believe the cutting file is by Debbie from Paper Pulse. For some reason it did not cut out correctly twice so the star got lost. I believe she might have a corrected file on her site. I actually think I like it better with the use of a gem star.


I just finished putting the star on this today The lid shown here is shimmery paper I misted a long time ago while playing. The star is from the Silhouette store. I painted the star with Folk Art Sapphire and glittered the frame to make my embellishment.

This is the last of my Christmas crafting for the year. I have company coming today. I did color a coupon I designed online also but I can't show it here just in case someone should check out my blog.

I will be making Krumkake this week with a good friend. I will try to get pictures and may even take a video. I have never made Krumkake gluten free so I hope they turn out as they are my son's favorite Christmas cookie.

Merry Christmas and Happy Holidays whatever holiday you may celebrate. Wishing you Happy Frugal Crafting till we meet again! 

Friday, December 20, 2013

More Gift Bags

Can you believe it is almost Christmas. I'm so far behind it is not funny. LOL! Perhaps if I didn't spend so much time making gift bags I would get more done. Since Christmas is not technically over until the 6th of January I still have time to get things done. ;-)

Here are two more gift bags I made using the SVG Cuts gift bag files.

I took the snowman which came with the file and turned him into a print and cut. I then added mistletoe from a Silhouette file on his hat. After he was cut out I brushed glue and sprinkled Martha Stewart crystal coarse glitter. I used green glitter for the ear muffs and scarf. I filled in the mouth with red glitter glue. I decided to use gems for his eyes. I also cut out the free snowflake file in Studio and brushed on glue and sprinkled with the coarse  glitter. The glue and glitter caused the scarf to curl and I decided when I glued the snowman down to let the scarf curl. Lol! It would not surprise me if Bug decides to carry this around as a purse.

This is the medium bag. I added the decorative strip on this one using shimmery paper. I was going to place the bell image on a paper doily but did not find them until I finished this. I had the cut out scallop circle in my stash along with another bird. I painted red Extreme Glitter on the circle. I finished the paint  so better remember to buy more before next Christmas. Once again I colored the leaves with peridot Extreme Glitter and used red glitter glue for the berries.

Yesterday I finally started decorating outside. My patio faces the parking lot and the entrance into the building so I thought it would be nice to greet people with some Holiday cheer. Besides both my neighbors above me decorated.


This was taken before I draped my Christmas flag over the air conditioner. I took my fountain and filled it full of flowers near the top and added candle lights. Wished I would have had more flowers to fill the rest of it. In front of the air conditioner is my tomato cage tree. I turned a tomato cage upside down and the plastic star keeps the wires together. I wired some of the candles on the cage and then wired a string of led lights.


I put a lighted garland around the post and filled a planter with fake flowers. The deciduous shrub provides nice privacy in the Summer but for now made it more difficult to decorate so that people could see. I placed snowflake lights near the concrete wall. The wreath on the door is strung with battery operated lights.

This was taken while I was coming in from a walk with the dogs. It is taken from the parking lot.

Opps! I was going to include some cards in with gifts and discovered that I never did the inside. I'm off to finish cards. At least these won't need to be mailed.

Just in case I don't post before Christmas I want to wish you a Merry Christmas and a Happy New Year. Although I want to make a couple of cards for the New Year I will have company so I don't know if I'll have time.

Thank you for taking time during this busy season to stop by. Wishing you Happy Frugal Crafting till we meet again!


Tuesday, December 17, 2013

A Couple Of Gift Bags

Hi everyone! It is getting down to the wire so I will keep this short. I'm making gift bags these days. Now that I have the hang of it is going faster. I figure the gift bags may get reused while the wrapping paper will end up in the trash. The files I've used for these are from SVG Cuts. I made the large and the medium bag. The medium bag is the perfect size for ornaments and I actually was able to put a book in the large bag. I haven't yet made the snowman bag but that is on my ever growing to do list.
Sorry about the air conditioning cord down the middle of the blue bag. It keeps falling off the top of the air conditioner.

The large bag takes four sheets of 12 x 12 and one sheet for the trim. I don't really have a lot of 12 x 12 in bulk so I have to do with what I have. It works out because blue is Ali's favorite color. Plus the bird I found in my stash has blue. The trim is called Men's tie and I bought the paper pack with it a long time ago at Big Lots.

 I painted Extreme Glitter Peridot on the leaves and used red glitter paint on the berries. The photo doesn't do it justice. Then I pop dotted it on the bag.

I was going to use this bag for a book for my Bug but it is too small. However, it is perfect for putting an ornament in. I embossed my card stock with a Teresa Collins letter size embossing folder. I don't know the name but it came with my electric machine. I was going to use a Sizzix embossing folder but it was too small. I have to admit that I do love the letter size embossing folders and hope to pick more up. Maybe if I'm a good girl Santa will bring me some.

The angel was also a left over. I used Extreme Glitter Hologram on the wings and the butterfly. I brushed gold glitter glue on her hair. I didn't want to cover the detail and have found that brushing glitter glue gives you a hint of glitter without covering up a lot of detail.

Gift bags are great for anytime of the year and there is so many ways you can decorate them.. My next medium bag I'll fold a doily over the top and put another bird print and cut on it.

Thank you for stopping by and looking. I'm off to hand deliver my paper circle ornaments. Wishing you Happy Frugal Crafting till we meet again!

Friday, December 13, 2013

A Memorial Ornament

My late husband's nephew called and wanted to know what my plans are for the 24th. Since moving I am now on his way when he visits family. He is going over to spend Christmas with family and will have with him his mom and dad.  The plan is for them to stop by and visit. I thought it would be nice to give Bill's sister an ornament with a picture of him on it. Sorry about the glare from overhead lights. No matter where I tried to take a picture there was glare and outside has been dark and dreary.

I sponge painted on a plastic ornament Peridot and Hologram Extreme Glitter Paint. While the paint was drying I went ahead and designed my image in Studio.  

I drew a circle and filled it with a graphic I created while Bill was still alive. The tutorial called it aged parchment. I then took the sketch music file which was a  weekly free one from Silhouette and turned it into to a print and cut. I added the text I'll Be Home For Christmas. (I had wanted the lettering to be green but no matter what color of green I picked out my printer printed it a really light color.. My woes with the printer is another story though. Let's just say I have plenty of scratch paper.)

 I took a heart shape from  the Studio library and modified it so that I only had the outline.  I filled the heart with the last photo ever taken of Bill and layered it on top. I placed the heart down under the music line with the text and aligned horizontally. I had already aligned the sheet music and circle and grouped them. 

After I carefully adhered the image with glue I coated it with two coats of Mod Podge. Then I painted a thick layer of Mod Podge around the edge of the circle to add the leftover beaded chain from a previous jewelry project. I first made my circle out of the chain before embedding  into the Mod Podge. I used a chisel edge sponge brush to carefully wipe off any errant Mod Podge on the ball and on the image itself.

All that was left was to tie a piece of ribbon on top to hang the ornament with.  I could have used an earring wire but I felt like the shimmery ribbon would be the perfect touch. Normally I would add a bow but in this case I felt like it would be too much.

You could use any shape but I used the circle because to me it represents unending love. It also represents my belief that our lives are a continuation with no real beginning or ending. I decided to add the music because Bill loved to sing and listen to music. The text is because that was not only his favorite Christmas song but that was his wish that he would be in his heavenly home for Christmas.The heart represents how loving Bill was. He accepted people with an unconditional love. The beads reminded me of prayer beads he used to carry.

Making this ornament for my sister-in-law was a way for me to give a little bit of her brother back to her. As I worked on it sweet memories flooded over me. Memories of moments which you had to be there to understand. Memories which reaffirm the deep love that we shared which not even death could steal.

What are your thoughts on making a memorial ornament? Is it too much of a Victorian type obsession where they actually made jewelry from the deceased hair and had photos taken of the deceased in their coffin which were displayed in photo albums?

I can't believe that Christmas is almost here and I have tons of things to do. Thank you for stopping by during this busy time of the year. Wishing you Happy Frugal Crafting till we meet again!

Tuesday, December 10, 2013

Extreme Glitter Sponged Ornamnet

Hi everyone this post will be short and sweet. I promise. I had so much fun sponge painting on my last ornament that I decided to play with just the Extreme Glitter Paint by Plaid on an ornament. I love the effect it produces and just wish I could have gotten a better picture to really show the beauty. I used both the red and the hologram. The paints may seem a bit spendy but believe me a little bit goes a long way. I usually buy mine with a coupon at Michaels but Amazon also carries them with free shipping with a $35 order. Here is my ornament complete with a image on it.
I wish I would have printed my image a little darker and more vivid. Still on the whole I'm pleased with how it turned out.
I decided to take a picture holding it in front of a light so you can see how translucent it is. Also some of the Martha Stewart coarse glitter that I sprinkled on the image while still wet from the Mod Podge shows up in this photo.

I glued the image I had printed and cut in a circle on the ornament with white glue. Then coated it with two coats of Mod Podge. I love how snowy it looks with the addition of some glitter.

I debated about whether to use white or red Recollection Adhesive lace and decided to go with the red. I don't think this lace is still made as I bought this on clearance a few years back. The ribbon I found at a Big Lots store several years ago just after Christmas. As I've said before I'm trying to use up what I have in my stash before buying more stuff.

Ideas I had while doing this ornament is the Extreme Glitter Paint because it is translucent would be wonderful to use on a glass candle holder. The other idea is that you could run narrow lace through an adhesive machine like the Xyron. and make your own adhesive lace.

I'm excited as today my Silhouette Stamping kit is suppose to be here. I can't wait to get my hands on it and play.

Thank you for stopping by and do come back. Wishing you Happy Frugal Crafting till we meet again!

Monday, December 9, 2013

More Ornaments

Over the weekend I played with trying to make ornaments but my ideas did not pan out. I did cut out a bunch of circles to make ornaments with the family but time together did not work out. Anyway this morning I had the bright idea to paint plastic ornaments with a sponge and acrylic paint. Here are the ornaments I made today.

/
 This is the sponge painted ornament. I used Folk Art Metallic Sapphire and Folk Art Extreme Glitter Peridot. I sponged on the paint with a snippet from a car wash sponge. The easiest way is to put the ornament in a cup like a Dixie bathroom cup and paint part of the ornament with the sponge. Let dry for about thirty minutes or longer if you are using a different brand of paint. You want the paint to be dry before turning over the ornament. Then turn ornament over and finish painting. If for some reason you do mess up the paint you can always touch up with sponge and paint.

Sorry I can't show you the front of the ornament as this is a gift and I know  the person sometimes reads my blog entries. I will however tell you my experience with putting images on an ornament. I discovered that smaller shapes work the best. Also you will probably need to snip all around the shape about 1/4" deep snips all around like you do before sewing a sleeve in a garment. You do want to make sure if it is a printed image that the ink you printed with doesn't bleed from the glue or sealer. I used two coats of Mod Podge over the image. While the second coat was still wet I carefully placed my cording around the circle printed image.

It would be fun to sponge paint an ornament like I did here and then glue sequins,rhinestones,strung beads,etc.

If I have time I'll do one with an image which I can show you on another blog post.


I love Cameron my Cameo. I used to make these ornaments as a teenager and did not have a cutting machine. At the time I used a compass with a pencil to draw my circles and cut the circles out by hand. It was a great way to reuse greeting cards. Yes, I come by my frugal ways honestly. LOL! In fact one year my mom and I made a wreath using dry cleaner plastic bags. That is another story though.

I have pads of cardstock that have been gathering dust for a couple of years and I decided this was a good way to use that cardstock. Out of 12 x12 I got nine 3" circles. I decided to go with a pattern and solid. It doesn't really show in the photo but the green is shimmery.

I used 16 3" circles but you could make the circles any size you wanted. The circles are folded so the pattern is inside or if the color is just on one side the color is inside.The folded circles are glued to each other until you have a round shape.

In the photo you can see the ribbon is not centered. After taking this photo I noticed it. I carefully took that section apart and the ribbon for some reason had come lose from the spine and shifted on me. So make sure the ribbon is secure on the spine before gluing the last circles together.

I found this video just in case you want to make these ornaments and need visual instructions. I am always amazed to discover things I did as a teenager still being done when it comes to crafting.

I have wrapping paper to make and all kinds of things left to do. It always surprises me how Christmas sneaks up on me.

 Thank you for stopping by and do come back. Wishing you Happy Frugal Crafting till we meet again!.

Tuesday, December 3, 2013

DIY Glitter Ornaments

Hi everyone! I hope you are having fun gearing up for the holidays.

I have books bought for my granddaughters. Both parents have said that they have way too many toys. Besides I used to buy books every Christmas for my son so I'm carrying on the tradition. I was fortunate this year to find reasonably priced at Amazon "A Dickens Christmas Carol" popup book. The popups designed by famous paper engineer Chuck Fischer are fabulous. It is really tempting to keep it myself. Although the book is for age nine and up Ali is an excellent reader and I'm sure she will delight in the popup illustrations.

I must confess I have not gotten my Christmas decorations out of storage and started decorating yet. I usually begin the first of December. Nor do I have my cards mailed yet but I do have them made. I did however spend a delightful Sunday afternoon crafting with my granddaughters. My son and daughter-in-law each made an ornament also. I wasn't sure they would but had taken over plastic ornaments for them also.

These are the ornaments that my son and his family made. I love how they used two different colors of glitter. Sorry about the glare from the overhead kitchen light. Even the three year old had fun shaking the plastic ornament with the glitter inside. A paint pen was used to write and draw on the ornaments. I love the design that Ali drew on hers. She also wrote Merry Christmas on the back.I suggested that the date be added because I know sometime down the road otherwise they are going to wonder what year that was. Also either a name or initials were added so that they would know who made which one. A permanent marker could be used instead of a paint pen.

Here is a link if you wish to make glitter ornaments. http://theornamentgirl.com/blog/being-crafty/how-to-make-glitter-christmas-ornaments-diy/

Ali the eight year old painted the wooden tree photo ornament and sprinkled sequins on the wet paint. Caitlyn the three year old used some markers and glitter glue on the snowman. I need now to print out photos which will fit in the frame so they can give the ornaments to their other set of grandparents.

Of course I'm invited over again as I brought marshmallow,caramel brownies. I had to move close to my son so I could bake goodies again. ;-) LOL! My son said I have not lost my touch making these. I didn't have the heart to tell him that although I used my own marshmallow creme and caramels that I used a boxed brownie mix for the base.

If our schedules work out next week we will make snow ornaments. I will cut out tree parts for them to make a tree to go in a clear plastic ornament. As well as perhaps a few other things. My son suggested that we use powder sugar for the snow instead of granulated sugar but I don't know how that will work.

Any ideas what I should bring over for dessert? I'm thinking perhaps making a batch of Krumkake and taking over some fruit and whip cream to put in them. Lol! This is one iron I did not get rid of when I moved. ;-) For those who don't know Krumkake is a Norwegian waffle which is shaped into a cone after being taken off the Krumkake iron. Because it is so much work to make them I used to only make them for Christmas or if it was a really special occasion.
*Frugal Tip*
If you do not have children or pets you can take old glass ornaments and soak them in warm water and bleach to remove the paint. You may need to use something like a baby wipe to get the rest of the paint out of the ornament. Of course if like me you browse for after Christmas sales you can pick up glass ornaments really cheap. It doesn't matter the color as you are removing the color. :-)

Thank you for stopping by and do come back. Wishing you Happy Frugal Crafting till we meet again!

Thursday, November 28, 2013

Sequin Tree Card

I was looking through a magazine this week and an article caught my eye about sequins being the new rhinestone. I just happened to have picked up recently at a thrift some star sequins not having an idea of what I was going to use them for. At the same time my friend Myrna wanted to know how to put a shape in a frame in Studio. That sent me playing in Studio. You can't see the trunk attached to the frame because the presents are in the way.

This was my test cut and you know me nothing goes to waste. Yes, Beth it was done on the gray cardstock which I haven't even made a dent in. I'm still trying to use it up. Lol!


 I painted the tree with Folk Art Extreme Glitter Peridot. I did two coats. The second coat while the paint was still wet I sprinkled the sequins over the paint letting them fall where they may. The paint acts like glue holding them in place. I used Elmer's glitter paint for the star. I found public domain clip art of packages and printed and cut those out. Glitter paint is also used for the ribbons and bows. You can't really see in the photo but one package I even stamped small stars on. The frame was painted with Extreme Glitter Holographic. It has sort of a pink hue to it. I glued the frame flat to the blank card base but used pop dots for the tree. So it sticks up. The individual packages were also pop dotted down near the edge of the frame.

I think the next tool for me will be a sequin pick-up pencil. to pick up and place sequins where I want them. I've seen several beautiful cards using sequins. In the meantime come Friday I should have my Christmas present to myself the eBosser. I'll let you know later what I think of it.

I'm off to finish the inside of Christmas cards and decorate envelopes. I plan Monday to go to the Post Office to mail my cards. Not sure whether I'll send some packages FedEx or not. It will depend on what their flat rate boxes cost. I will be investigating that either Friday or Monday.

For those who celebrate Thanksgiving have a Happy Thanksgiving and may your dinner stay off your thighs. Wishing you Happy Frugal Crafting till we meet again.

Monday, November 25, 2013

Mobile Christmas Card

I was watching an old episode of Spotted Canary on Public Broadcast television. On this particular show Joy was showing how to frame pictures and hang them so they would twirl in the breeze. My mind immediately thought that idea would make a neat card. I did not use two frames like she did but took the general idea to make my card. This is my first attempt.

 Alas I made the mistake of using some awful recycled white cardstock which is only 65 weight. As you will see in the pictures my card does bend. The other problem was that when I was taking one of my frame card bases off the mat that the card stock actually separated leaving part of the cardstock on the mat. :-( I really should have printed out a new card base. No matter how green you wish to be stay away from Office Depot Recycled cardstock.


I think it would be a little sturdier if the frame was a little thicker I will adjust my cutting file. As well as  definitely use heavier cardstock.

You will want to cut out two frame card bases and two separate frames. The string for the shapes will be sandwiched in between the frames.

Although I used the coil brads from Karen Foster to wrap the string around you can glue the string down.

 I did not get the bottom string as tight on the sentiment shape. So make sure you have your string tight before adhering the other frame.


For the snowflake I only cut one as I decided to tie the crochet thread to the snowflake itself. This snowflake I think comes in the Studio library. I heat embossed it with Stampendous Winter Wonderland embossing powder.


 Mister snowman here was a free file. I used the Marvy Snow Pen on him but think from now on I'll stick with puffy paint. I decided to make two fronts as he loves to twirl around and I didn't want him to be rude and turn his back on people. LOL! I colored him with a Sharpie. Attached ribbon to his hat and ribbon for his mouth. His mouth was cut out so the ribbon is on the backside. Used hot adhesive rhinestones for his eyes and buttons. Glued strips of yarn on for his mittens. Wrapped crotchet thread around his neck for his scarf.


 The mat used here is a piece from Recollections Frosty Winter collection. The embossed piece is DCWV Shimmer Core. When embossed the white core shows through in places. I did go ahead and remove a little more of the top layer with an emery board to give it a distressed look. The Merry Christmas folder is a retired Sizzix one.

I think this would make a cute card for other occasions. Would even be cute as a decor piece in front of a window. I can see this with flowers and butterflies in front of an open window come Spring. What do you think?

O.K. I'm off to clean my "playroom". Especially since I now have a thin coating of embossing powder everywhere as I accidentally held my embossing gun the wrong way and the powder flew out of the tray. LOL! That is what I get for not pouring the powder immediately back into the container.

Thank you for stopping by and do come back. Wishing you Happy Frugal Crafting till we meet again!

Sunday, November 17, 2013

Patchwork Stocking Card

My dear friend Alice Golden is the Queen of card making and Scrapbook layouts. She is also a very generous person and shared her pattern for a patchwork stocking. It was easy to turn it into a cutting file once I remembered to do a few things. Of course when I saw her beautiful card I decided to make my own.

If you have been following my blog for any length of time you will know that I dance to my own music as well as experiment. I started out by taking a pre-made card base and sponging gold glitter glue around the edges.

I experimented with embossing tissue wrapping paper. I discovered it worked best if I glued the tissue paper on cardstock and then embossed. The embossing folders I used are two retired Sizzix Christmas folders. I especially like the Merry Christmas one. To be honest I had forgotten I even had Christmas embossing folders or I would have used them sooner. I also embossed the middle shape on the stocking.


The stocking is cut out of vanilla cardstock. I then stamped using my lace background stamp and Antique Linen distress ink. While unpacking things and sorting through scraps I found some from Recollections Frosty Collection as well as some shimmer scraps from DCWV.  I also went ahead and used one piece from MAMBI Specialty Cardstock. The stocking cuff is cut out of a scrap of white cardstock left over from a print and cut. I then used Martha Stewart glitter flocking on it. The Dear Santa is from MAMBI Soft Spoken. It is an older product so I'm not sure it is still available but something similar could be done if you wished.

The pattern for the stocking can be found at Alice's blog

After downloading the pattern I went and traced it in Studio. Then in order to get the separate pieces I had to release compound path. I went ahead and deleted the numbers which traced. 

It only took me four cups of coffee before it dawned on me how I could make faux stitching. I have made faux stitching before with a pen but I really didn't want to do that this time. I have also used my sewing machine without thread but sometimes she is demon possessed I think and rips things. I took the individual pieces and did an internal offset. Then it was easy to change the line setting to a dash line. Now if I remember how to do this next time I want the look of stitching but don't want to do it. LOL!

It was a pain to try to get the pieces glued down in the right position. I think it would be easier if you printed out the pattern and cut around the stocking. Then you would know exactly where each piece goes. However, I seem to always do things the hard way. Then think of an easier way later.

I think it would be fun to do the stocking in nontraditional colors. You could even use the stocking for cards besides Christmas.

Thank you for stopping by and do come back again. I'm off to see about making a paper bowl I saw on a craft show. If it works one of my granddaughters can make one for a Christmas gift. :-)

Wishing you Happy Frugal Crafting till we meet again!

Thursday, November 14, 2013

Silhouette Three Kings Card

In the book Handmade Greeting Cards there was a card with a star cutout and then gold paint added to the card. The woman called it the stardust technique where you put gold paint on one sponge and then kiss it on another sponge and use that sponge on your card. Well my gold paint and stars didn't end up being as soft as her's. Maybe I was using a different kind of sponge.

 I decided to go ahead and stamp a sentiment and to add a silhouette. I know it is probably just me but the card just looked too plain to me.  All in all I'm pleased the way this card turned out.
This was a quick and easy card to do. There are times I like to do quick and easy.

The card in the book was done with dark blue cardstock and white lining the card. I don't have any dark blue and I figured since purple is the color of royalty as well as Advent to go ahead and use that. Also I have more of  vanilla color cardstock than white so went with that.

First in Studio I made my cardbase. I decided to go with rounded corners for a change. Of course if you don't have a die cutting machine but have a punch you could punch your star in your card base. Then I took gold paint and did my stardust technique.

The stamp is from Inkadinkado Warm Holiday Wishes clear stamp set.   I inked the stamp first in gold and then in black. So there is a hint of gold. It also softened the black a little bit.

(I fell in love with this stamp set last year and was able to buy it for half price. Amazon and other places still carry this stamp set if you are interested in buying it..)

The three kings image was found here http://jobspapa.com/ephiphany-clip-art.html Since it was already a silhouette it was easy to trace to cut.

It took me longer to find the silhouette image than it took me to make the card. I could not believe that with my ton of digital images I did not have a suitable image to use.

I was able to renew the Handmade Greeting Cards book so my next project will be the patchwork stocking card that Alice has on her blog. I can't wait to get started pulling out papers and going through my scraps.

 Do you plan to make some Christmas cards or to go the store bought route? Which by the way there is nothing wrong with going the store bought route. After so many years being so exhausted on Christmas Day that I couldn't even enjoy the day I've learned to do only what gives me pleasure. I will be honest it would not give me pleasure to make a hundred cards to give so if I had that big of a list some of the cards would be store bought.

Wishing you Happy Frugal Crafting till we meet again!

Tuesday, November 12, 2013

Interlocking Tree Card

I need to return to the library " Handmade Greeting Cards".. Before I do though there were a couple of cards I wanted to try out. One of them was the interlocking Christmas tree card. Well I ended up making some changes but more on that later.

 It took longer for the glitter glue to dry than for me to design the cutting file and put the card together after it was cut out.
 First I looked at the diagram in the book and thought it won't be too difficult to design the stump part on one side of the card and a triangle with a star on the other side for the tree. After I got the triangle done I went in search of my star cutting file. While looking for it I found a tree file which had been a free file at one time. So I decided to see if that would work instead of the triangle.  In less than a minute I had the file modified for my purposes.

I was going to have the tree patterned and the background solid so I could do some sponge painting for stars. However, I put the pattern side up on the mat so I ended up with the tree solid. The cardstock is Dollar Store brand double sided. I wish I could find more of it even though sometimes it has some imperfections.

Earlier I had bought a package of an assortment of  Elmer's jumbo glitter glue in a bargain bin so I decided to play. First I took the silver and outlined the tree. Then I took some Martha Stewart coarse crystal glitter and dumped over the silver so it would give more of an illusion of snow. I had fun then painting the star and drawing my garland and small dots for ornaments with the glitter glue. I used a fine point Sharpie to color in the trunk.

I wanted to put a sentiment on the front but wasn't sure how I was going to do that. Then I saw the scrap of card stock left over from cutting the card base out. I was able to cut a rectangle out it the perfect size. The stamp I used is an old Hero Arts stamp. I did not see it in their catalog but did see it on e-bay. Both a used one and a brand new one. I used Brilliance Galaxy Gold ink. I decided to place the sentiment on an angle and to clip the edges that were over the card edge.

I think it would be fun to make interlocking cards with other shapes. Perhaps one of these days I'll play around with that.

I'm not sure what I'll do next. As I said I want to play around with a few more card ideas in the book. However, my friend Alice from Golden Moments shared her quilted Christmas stocking card as well the pattern and I would love to make one of those. If you are looking for some inspiration to make a Christmas card go over and check out her blog as this is the cutest card ever.

Are you starting to get ready for the holidays? I don't know why but today I was actually ready to go put some Christmas music on and it hasn't really snowed much yet.

Hope all is well in your world. Wishing you Happy Frugal Crafting till we meet again!

Tuesday, November 5, 2013

Chain Link Technique

I will admit that I don't really spend as much time playing around in Studio as I did when my Cameo was brand new. However, this week the technique of the week for Technique Junkie is the chain link technique. This was the perfect opportunity for me to play in Studio. Here is my chain link Thanksgiving card.
I took a piece of the cardstock I had glued the packing paper on and painted it with thinned acrylic paint. I then went and placed clear plastic wrap on top of it and then my box full of inkpads because it is heavy. By placing something heavy over it the cardstock did not curl. Using clear plastic wrap on wet paint you never know how it is going to turn out.

I took a scrap of the packing paper cardstock and stamped using my Hero Arts five leaf stamp. I just used the top portion of the stamp as my cardstock is narrow.

For the chain I took a free leaf border file which was a Silhouette weekly file. and took one of the leaves to make my chain.I welded the stem part of the file to the leaf. Then replicated the leaf a few times and once again welded. That gave me this nice chain of leaves.

Once the chains were cut out I heat embossed with some bronze Ultra Thick Embossing Enamel. I thought I had some copper embossing powder but could not find it so maybe I used it all up. I decided to leave the leaves with imperfections instead of totally smooth. A juicier inkpad instead of my watermark inkpad would have been better to use with the UTEE.

I ran out of glue and need to glue down the ribbon better on the edges which I will do before sending this.The "Blessing" is from Me And My Big Ideas (MAMBI). Originally I was going to place it in the stamped area but it looked too busy.If I would have been thinking I would have placed it first and then stamped on each side.

Today it was lightly snowing. The first snow of the year. Did not get much and it looks like it has already turned to rain. It reminds me that Christmas will be here before I know it so I better get busy making decorations,cards, buying presents, etc.

Thank you for stopping by and do come back. Wishing you Happy Frugal Crafting till we meet again!

Sunday, November 3, 2013

Indian Blessing Card Tissue Paper Collage

I have had this rubber stamp that was given to me gathering dust for a few years. To be honest I never was sure how to use it. I was looking at it and thought perhaps I'll make a Thanksgiving card with it. Well,like most things I do this card ended up going a totally different direction.

It started with me trying to find a way to use tissue paper that I bought to try a technique which is pretty much bleed resistant. So although I only paid a dollar for the wrapping tissue paper I didn't want to waste it. I decided to see if I could stamp on the tissue paper. I wasn't sure as it has a coating on one side. I still had in mind making a Thanksgiving card until this morning when I looked at my stamped tissue collage and inspiration hit.
Being the "Queen" of frugal I first took a piece of gray card stock left over from a print and cut and cut it to size. One side had the printed registration mark on it so I turned that over. I then tore the tissue paper into random shapes and sizes. Using a glue stick I started layering the torn pieces. Some places have more pieces than others. I really like how it turned out.

When I was satisfied with my collage I stamped. The stamp I used is "Journey's End". I did find this link if you would like to purchase the stamp. http://ibrakeforstamps.com/journeysend.aspx

I tried on a scrap of tissue paper first using Vintage Distress Ink but the detail was not as crisp. So I went back to using my old standby for detailed stamps. Memento Black Tuxedo. It pays sometimes to play with ink on scraps first.

I felt like this card needed something but was not sure what. Then I decided to see if I could find a short Indian blessing to print on the leftover packing paper. The person I'm making this card for has often said the blessing about my moccasins making happy tracks in the snow so when I found this blessing I knew it would be perfect. I did the sentiment in Word but any word processing program would work.

I took a piece of copy paper that was scrap because my printer had messed up. On the backside of the paper I sprayed adhesive and then covered it with the packing paper. For me it was easier to put a bigger piece of paper on  and then trim to letter size. I decided to do the full size this way as the copy paper gives the packing paper more body and I can use the scraps in other projects since I don't have "Kraft" paper or cardstock.

Another way to do it would be to print on copy paper first and then glue your piece of packing paper over the printed words and print again. My printer has a rear load as well as the drawer and for something like this it is better to load it in the rear. By the way if you are adventurous you can print on ribbon or fabric this way.

That's all for now! I've been doing more experimenting and still have one more Thanksgiving card to come up with. Just not sure how I'm going to do it. Hopefully my muse will come and tap me on the shoulder.

Wishing you Happy Frugal Crafting till we meet again!


Monday, October 28, 2013

Thanksgiving Joys

When I was going through my Thanksgiving images I wasn't sure how I was going to use this image from Dover Publications. Then when I received a shipment with tons of  brown packing paper wrapped around the item and saw in one of the decorating books where leaves where used for a decorative paper I knew.
On the card base I used the border from a frame stamp I bought at a thrift store near the top. The stamp ended up being larger than I make cards and so I've never used it. :-( I used red gold ink and it ended up being really subtle.

The background the image is on is from the brown packing paper. I gathered  leaves that were not dried up yet.   I first mixed metallic orange and copper paint and painted on the  leaves vein side.  I then painted some leaves with red which I mixed with the orange. With my brayer I smoothed the leaves down. I went ahead and overlapped the leaves. So it looks more like a pile of leaves than individual leaves. The packing paper was already wrinkled but after the paint was dried I crumpled it up into a ball and then unfolded it. Then with a cotton ball and vintage photo distress ink I rubbed ink on my background.

I have all of this ribbon that I seldom use so I decided to go ahead and glue ribbon for a border on three sides. I figured that adding ribbon this way would not add a lot of bulk to the card for mailing purposes.

I edged the image with red gold ink. I had taken the sentiment and cut an extra one of those out. I did not like the purple hue to it so used yellow and cinnamon chalk on it. Then I edged it with gold ink and pop dotted it on top of the sentiment on the image.

The leaves have all been raked up but hopefully I will be able to collect some more for another idea I have.

Alas I forgot to take my camera over to my son's house as I was going to post some pictures of Ali decorating a gourd for Halloween. Opps! I had forgotten to take a brush over for her to brush gesso on the gourd so she ended up using her fingers. I even got my son involved as I had him dry the gesso with their hair dryer. Anyway it is the scariest looking ghost gourd I've ever seen.

Wishing those who celebrate Halloween Happy Halloween! For the rest wishing you Happy Frugal Crafting till we meet again!


Friday, October 25, 2013

Marie Nutcracker Birthday Card

My "Bug" is turning three next month. Where did time go? Seems like just yesterday I was driving over to visit her as a baby. Anyway "Bug" has dancing in her soul and is definitely what I call a "free spirit". When she is home the only way her mom can launder the tutu is to grab it while "Bug" is in the tub. "Bug" lives for the days when she has dance. Oh and did I mention that she is very much a girly girl unlike her older sister.

I was trying to decide what to get her for her birthday as well as what to make her for a card. I figured the "Nutcracker" book would be too advanced for her and I didn't think she would sit still long enough to watch the "Nutcracker" on television if I got a DVD of it. Then I discovered that Susan Jeffers has illustrated the "Nutcracker" with minimal text. Being familiar with the illustrations that Susan Jeffers does I decided that is what I will get her for her birthday. In the book it is Marie which I think is the name in the original version but in the ballet at least the West Coast version I saw it is Clara.

Well to make a long story short when I was going through my massive collection of graphics from Dover Publication I came across images from the "Nutcracker". Then while looking through the book "Handmade Greeting Cards" I saw a beautiful card using triangles and loved the way they used them. From there the card pretty much made itself.
I used the knife tool in Studio Designer Edition to make the edge. The pink showing is actually another card base cut from shimmer card stock glued inside.The background of the card base is from Free Vector Graphics. I opened it up in Photoshop Elements and because I'm  lazy I did a copy in PE and paste in Studio. Once in Studio using the fill pattern option I mirrored it horizontally as I wanted the butterfly on the right. Marie is a print cut from the image I had on hand. The butterflies dancing around with her are cut from the background image and resized to fit. The sentiment came from a free weekly birthday card file which never did anything for me. I drew a rectangle around it and filled it in as well as the letters in Studio. I printed it on vellum.

  This is washed out a little color-wise in the photo but I wanted to try to show some of the shimmer and glitter. Unfortunately I never could really do this card justice taking photos. Both the green and the pink triangles are cut from DCWV cardstock. The pink inner card and the green are from their The Shimmer Stack. The pink glitter triangle is cut from their Street Lace. I'm pretty sure both of these pads are discontinued. I had not used the glitter cardstock cut setting in Studio and was pleased that it cut the DCWV glitter cardstock perfectly. (Even with a well used blade) In the past I had a hard time cutting it cleanly and clear through.(I'm a happy camper as I have several pads of it I bought a couple of years ago.) For the butterflies I wrapped magenta Karen Foster Scrap Floss around them to make their antennas and pop dotted them onto the card.

I hope "Bug" will enjoy her card and her book when her birthday rolls around.

Off to enjoy the sunshine while it lasts. Wishing you Happy Frugal Crafting till we meet again!

Wednesday, October 23, 2013

Interlock Magic Thanksgiving Card

Recently I checked out of the library "Handmade Greeting Cards" by Maureen Crawford. When I was looking through the catalog there was no image of the book cover but I didn't think I had checked it out before. I had not and although it is a thin book less than 100 pages it is full of ideas and tips. The interlock magic card is one card featured in the book. I looked at the diagram and although I never took geometry in school figured I could make my own cutting file of the semi-circle one. The interlocking jigsaw one might be a little more challenging but I think I can do the Christmas one in the book.
 This is the inside. . Notice the quarter circle on each end. That is what allows the card to interlock. I went ahead and stamped with gold ink the edge on the cut side. The stamp is "Five Bold Leaves" by Hero Arts. I just bought it last week at a thrift store for $1. Along with some single Hero Arts Leaf stamps for the same price each. :-) They are probably retired stamps but that is all right with me.

I used double sided card stock I bought at Dollar Tree last year. I love the tapestry look of the elk image. Alas though it has a large white area where  there had been a border. Although Dover Publications also had it with the border I did not care for the border. With the knife in Studio I cut off as much of the white that I could without cutting off the bottom elk. I was left with a small rectangle of white. I used the offset function in Studio to make the frame.

With the knife I cut the Happy Thanksgiving off of a page of graphics to make the tag which covers the rectangle. I drew a round corner rectangle around the image and then did an offset. For some reason Cameron kept cutting things off. I ended up having to place the elk image clear in the middle of the page to get it to cut right. After trying to cut the tag out five times and it not cutting right I hand cut it. Think it is time to roll back to a previous version of Studio where I did not have this problem. After the tag was cut out I inked the edges with red gold ink.

 I decided to go ahead and glue the tag so that it was off the image to add a little more interest. I pop dotted the image with tag onto the card base. Then I went ahead and trimmed the tag flush with the card. In graphic terms it is called bleeding.

 Good thing I'm a patient person because not only did I have to print and cut the images several times but I also had to take the picture of the outside of the card several times before I got both a good picture of the elk image and the gold stamped leaves.  Of course I'm looking at this image thinking it would make a nice masculine card for other occasions. :-)

One Thanksgiving card done and a few more left to do. Good thing Thanksgiving is going to be late this year. LOL!

Thank you for stopping by. Do come back as I plan to be making more cards using the ideas from this book. As well as perhaps make some decorative papers and cards from a couple of other books I checked out.

Wishing you Happy Frugal Crafting till we meet again!

Saturday, October 19, 2013

My Take On Pasted Dylusions Halloween Cards

The Pasted Dylusions technique is in this month's Technique Junkies Newsletter. The only problem is although the technique looks like it would be a fun one I don't own any Dylusions ink spray. The technique also uses metallic embossing paste. I don't own that either. As much as perhaps I would love to buy these products my goal for this year has been to use what I have already on hand. O.K I will confess I've been seriously looking at knitting looms but this is something my grandchildren could have fun with also. This is my take on the technique.


I have no idea where this pumpkin image came from but I saw it on my computer and thought it would be fun to make a card with it. I did a print and cut and then made a copy of the cutting lines to make my card stock stencil.  It printed a weird color so I used chalk on it and then used Mandarin Orange  Perfect Pearl. You can't really see the shimmer in the photo. 

I have moulding gel but it dries clear and wasn't exactly what I had in mind when I bought it. However, I decided to see if I could mix some acrylic paint in it. With a plastic card I applied the gel mixture. I made a couple of goofs with the gel but a couple of print and cut images covered those up. By the way have I told you I love my Cameo and what I can do with my machine. It amazes me how nicely small embellishments cut out. Using the Studio software I detached the witch spider from her web.

Once I discovered that the gel worked I went ahead and sprayed my card stock with a couple of Mister Huey color mists. I love how it turned out.. When the card stock was dry I went and used my gel mixture with the stencil again. When mixed with acrylic paint the gel mixture takes longer to dry so I could use my card stock stencil. When I had tried with just the gel previously the card stock stencil had stuck. :-(

These are the last of the Halloween cards that I need. Don't know what I will do next. I'm thinking of collecting some leaves and making a leaf print background for a card. I also want to try a couple of cards I saw in a book.

Thank you for stopping by and leaving comments. Wishing you Happy Frugal Crafting till we meet again!

Friday, October 18, 2013

Reverse Background Halloween Card

When I saw this technique in the Technique Junkie newsletter I knew I wanted to try it. Just wasn't sure which direction to go. I finally this week decided to go with a Halloween theme as I need a few Halloween cards. But it had to be something which would go through the mail without me paying extra postage.

The background is stamped using a Ditto stamp named double vision. I used Tim Holtz Distress Vintage Photo ink I don't know who designed the spider web but I think it was someone on the Silhouette Plus forum. It doesn't really show in the photo but I used a clear glitter pen. The pumpkin was from a image which I just traced around in Studio to get the pumpkin shape. It also is stamped with the Ditto stamp but I used a white pearl embossing powder on it. I painted distress ink over the embossing. The Halloween is an image from Dover Publications. You may have remembered seeing it on my "magic" card. On the inside I put the spider web with the witch spider. Another image I also used on the "magic" card.

Today felt more like a Spring day than a Fall day as the sun shone brightly and it was warm. I walked to the library to pick up a novel on hold and lo and behold a card making book I had placed a hold on had finally made it to my local library. Between that book and a few books on making decorative papers look for some more inspiration in the future. In the meantime thank you so much for stopping by and do come back.

Wishing you Happy Frugal Crafting till we meet again!

Friday, October 11, 2013

Magic Halloween Card

Hi Myoriah here today to share with you a Magic Halloween Card. For those who belong to the Silhouette Plus Forum I still have hair. LOL! Once I figured out how to do this card it was easy and it really is magic as you will see from the photos. Go grab yourself a cup of coffee and prepare to be enchanted.

Doing the ribbon is a real pain and you will see from my photos that I got it too loose on the crisscross. Next time I will go and use card stock for the strips like in the tutorial that Nick made. It will be a lot easier. All images are from Dover Publications I just did a print and cut for the separate single ones. Shh! Don't tell anyone that I didn't use a single stamp. I might have to use my name stamp on the spider panel.

Sorry I accidentally cut off the bottom of the card with my camera but I was afraid that I would not get the glitter to show again on the ghosts if I retook the picture. I started out using double sided card stock that I bought at a Dollar Tree store. I figured this orange would be perfect for a Halloween card. Alas although Cameron was set to cut to the edge he didn't so I had to trim both cards so that the fold was in the center. The cutting file is super easy to make as you will see when you watch the video. Of course if you wish you can always buy the template from Green Sneakers.

I edged both cutouts with Vintage ink to give a little bit of dimension. I then used a glue stick on part of the ghosts and sprinkled Martha Stewart crystal glitter. The pumpkin with the ghosts is pop dotted.

 This is the inside of the card. The ghost image actually has a secret message which will be visible in the last photo. My images could have been a little longer and I did think of adding a border at the top and bottom of them. I did manage to put the image so that you have one or both eyes showing on the crisscross side. The Halloween was glued onto the image. The image did not come with it but I thought it was cute. Just make sure you do not get any glue below the image if you add anything as you do not want the image stuck to the card stock or the magic won't work.
This is the back of the card or maybe it is the front. LOL! I traced the spider with my clear glitter pen but it does not show up in the photo. I just couldn't resist this cute spider and hopefully it will not gross out my granddaughter who is afraid of spiders. LOL! You will never catch her rescuing a spider and placing it outside or letting a spider live in the house.

This is the inside of the card. Notice how the images are now in reverse position and a message is revealed. Just ignore the childish printing. Now you know why I do everything on the computer. When you close the card you now see the pattern front again. Of course you could always do both fronts the same and use solid card stock for it to really look like magic.

Here is the link and video for how to make a magic card. I thought of doing a tutorial but this video is so well done. If you do not want to buy the template from Green Sneakers a inch slit is about right for the top and bottom. http://www.greensneakers.com/videos/A2-magic-card-template.html


This is a really fun card to make and the person who receives this card will think that you are a Magician. If you don't want to make a greeting card you can use this same process and make a Magic Card to wow your friends with. When I was growing up I had one I would put a dollar bill in and show my friends. They never could figure out how I made the dollar bill change positions. LOL!

If you decide to make a magic card  please come back and leave me a comment. I would love to know how it went.

Thank you for stopping by and do come back. I'm not sure what I'll be doing next but it might be a technique from Technique Junkie newsletter.

Wishing you Happy Frugal Crafting till we meet again!