Wednesday, March 25, 2015

Last Altered Playing Cards

Hi everyone, can you believe that this is my last two altered playing cards. How sad that the challenge is ending. It was a fun learning experience and a lot of things that I did with my altered playing cards I will be able to do creating regular cards. Lol! Doing layouts on regular cards will now be a lot easier after working on the smaller playing cards.

For the last two cards Claudine rubbed ink over the gesso and when it was dry she heat embossed. Instead of rubbing ink over my cards I used my airbrush and then because one card was rough and I thought it would not stamp well I went ahead and covered that one with a piece of a sewing pattern. As it was the card I heat embossed was almost a disaster when the gesso started to lift from the card from my heat gun.

Here is Claudine's cards:
And here are mine. As you will see mine are  different but I did go with the postal theme of her first card here. I also went with using green  but the sewing pattern turned it more of a  yelloa and orange on the other. Drum roll please as here are my last two cards.
 For this card I airbrushed with a couple of different green colors.on a background I had used a stencil with gesso when I was prepping my cards. Since I decided I wanted a smoother surface I went over the card with gesso but when it dried the rectangles from the stencil was still visible. Since I didn't have any background stamps like the one that Claudine used I decided to go with the sewing pattern. Since I had gotten rid of all my sewing patterns this was one I picked up at a thrift store to use in crafting.

I played around with printing images using my printer on book pages. The line drawing of a woman didn't work as you could not really see the details so I decided to go with this image after darkening it so it would show up on the old dictionary page. Although you can print directly on book pages I hate to have to mess with print settings anymore than I have to so I used the same technique I use for printing on fabric. First I print my image on regular copy paper. Then I spray with a temporary adhesive the back of my fabric or in this case the book page.  The book page did end up with some speckles but in the final image it isn't really noticeable. You could probably if you printed registration marks on the copy paper when you printed the first image go ahead and use your cutting machine to cut out your image. I cut the lady out by hand. Then I took a blue oil pastel stick and drew around her and then smudged with my fingers. I decided to go with the blue instead of the black because my sentiments have blue letters. For those who are wondering about why I printed out on copy paper first is because it gave me an idea where to place the book page. Printing first is especially useful if you are going to print on twill tape or ribbon.

The sentiments are from Teresa Collins Everyday Moments collection. I did trim the Define Yourself one as it was too long. I also used blue ink to edge it with. I figured they had been in my stash for long enough and just fit with the sewing pattern and the lady printed on a dictionary page.

For this card I used a couple of different orange markers and a yellow marker with my airbrush to color my gesso background. Then I used Stazon Black since I wasn't sure my Archival. ink was going to hold the clear embossing powder. Everything was going fine with the heat embossing until the middle started to lift. Luckily the bird and the canceled postage stickers were able to hold it down in my finished card. Lol! The stamp is by Stampendous.and is call Christmas Cling Rubber Snowy Postcard. Jo Ann has it for sale online right now and I'm sure it is available at other places.Of course this is just a section of the image as the stamp is larger than a playing card.

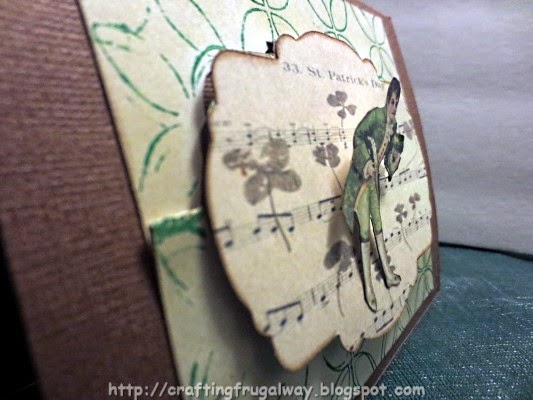
My postage sticker came in a vintage scrapbook kit I bought at a warehouse store several years ago. I was going to stamp a bird on a dictionary page but the stickers from Everyday Moments was still out and my eye caught the bird. I thought it would be perfect. The sticker had a white border so I took a black oil pastel stick and drew around the edge and once again did smudging in order to try to soften the border. This time I used a cotton swab as I wanted to blend in the oil pastel more than I did on the first card.

Normally I shy away from using stickers but I think they really worked out on both of these cards.I also think it really worked out edging with oil pastels and smudging so I'll keep that in mind.

Although this challenge is over I'm behind in my personal challenges. I also want to start entering other challenges as they help me to get out of my comfort zone.

Yesterday finally got my paper sorter put together so now it is putting paper in it. This one is by Safco and the middle shelves are adjustable which I like,. Some of the pieces were damaged but the company with no questions asked immediately sent me out a replacement.
*Sigh* It doesn't look like the rain will be stopping anytime soon. I wonder if that is why I saw a boat hooked up to a pickup in the parking lot when I went grocery shopping today. Maybe the owner knows something I don't. Lol! Oh well it is good weather for reading, crafting, and even organizing.

Wishing you Happy Frugal Crafting till we meet again!

Monday, March 23, 2015

Altered Playing Card Week 26

Hi everyone here it is week 27 in the altered playing card challenge our last week and I'm a week behind. The theme was to do monochromatic cards. I used my printer to print my image as a monochromatic image on the first card but I just couldn't bring myself on my second card to also print it out as a monochromatic image. Both images are from The Graphic Fairy.site. I did crop the first image. I didn't have any cute whimisical stamps like Claudine has so went my own direction.
You can't see the background I created because the lace stencil and washi tape covers it up. It was an experiment and alright but just alright.After adhering my paper down I took a piece of lace which I have saved to use as a stencil and my airbrush. I love how nicely most lace works as a stencil. As I said I took my image and using my printer turned it into a monochromatic image. After she was glued down I took washi tape and framed her. While cleaning I found a stamp set with a couple of different letters of h and the word appy so decided to stamp on the washi tape. My teal blue did not show up so I went with black. I meant to edge the card with teal blue ink but accidentally picked up the black. Since I stamped with the black I think it pulls things together.

For this card I took a scrap of vinyl wallpaper to use as my background. I took a lilac color of dye ink and changed the background color. Then I mixed up gouache paint to stencil my flowers. For some reason the flowers look more blue here to me than they are. After I was through stenciling on the wallpaper I used a purple Glaze pen to outline the flowers. Then I used Liquid Pearl to make my centers.  I printed and cut my lady out. Then I placed a piece of washi tape on a piece of tissue wrapping paper to make a scarf for in her hand. I used a scrap of the same wrapping tissue to stamp my sentiment on. I love how the stenciled flowers with the pearls shows through the paper. I edged with one color the card but it really didn't show up so I went with Stazon Royal Purple. I think this is one color I'm going to have to buy reinker for. Lol!

There you have it my cards for last week. While I was playing with the wallpaper I learned that I can use my airbrush with markers to change the color. This would be a great way to use leftover wallpaper or wallpaper found either on sale on at a thrift store. I often find wallpaper  and wallpaper borders at thrift stores.

I was hoping I was going to be able to share a picture of  my new paper sorter but alas one of the pieces was broken so I'm waiting for a replacement. In the meantime everything which was in the file cabinet is now stacked on my cutting table. :-(. I'm hoping the replacement  piece which is suppose to be here this week will not be damaged also.

Off to find some things I want to use in this week's altered playing cards. I'm sad knowing this is the last week but I do have some personal challenges to catch up with. Talking about challenges I was pleased that my altered medium Twinchie was a winner in the eBrush competition. 

Wishing you Happy Frugal Crafting till we meet again!

Sunday, March 15, 2015

Quote Twinchie

It was a rainy day so I spent it playing. I tried a technique of spreading paint on wax paper and then doodling in the paint. It didn't work when I put my card over it and lifted. I decided while the paint was wet to use a cuticle stick to write in the paint.
I took my airbrush to add gold speckles to my background. For my sentiment panel I used a Spellbinder die with a piece of confetti card. While the die was still on the card I used my airbrush. First I brushed the purple  and then place a piece of lace over the die and brushed with a blue marker. I dTree.on't know what stamp set the sentiment is from. I added a dimensional butterfly which I bought at Dollar Tree.

I love the results I got spreading paint on the wax paper and then placing card on it and use da brayer. Then lifting the card. I noticed that the painted wax paper would be good to use for projects also.

Wishing you Happy Frugal Crafting till we meet again.

Saturday, March 14, 2015

Altered Medium Twinchie

Hope everyone is having a nice weekend. I decided to play. I bought some corrugated cardboard on clearance as I thought it would be fun to play with. It has been sitting for a few weeks now in a drawer and I decided it was time to see what I could do with it. I love how it turned out and will definitely be using this technique for panels on cards. :-) Of course it won't turn out exactly the same next time.
I started by randomly applying strips of paper to the corrugated cardboard. Then I randomly applied gesso in places. After the gesso was pretty much dry I took a stencil and applied paint. I would use one color with the stencil and then move the stencil and do another color. I wasn't trying to stencil the actual pattern. After the paint was dry I used a couple of  green markers with my airbrush. I love the result I got

For my flowers I took wooden pieces by Calico Studio and airbrushed them. Then I glued a gem in the center. For my stems I used a chenille stem which I also airbrushed since it was originally white, 

As I said in my last post the eBrush twinchie challenge ends Sunday. It was fun to see what I could do with such a small size and to try new things. Who knew that ordinary corrugated cardboard could turn out so pretty.

Wishing you Happy Frugal Crafting till we meet again!

Thursday, March 12, 2015

Spring Twinchie

How lucky can you be. Two posts in one day. Over on the facebook eBrush forum there is a challenge for creating twinchies using a eBrush. For those who don't know what an eBrush is it is an air brush which you can use all kinds of markers in. Soon those of us who are the proud owners will be able to use other things like paint, food coloring for decorating baked goods and even makeup. I'm not being paid or compensated in any way but even if I was if I thought it was a dud I would tell you.. This is the one tool you don't want to be without. Not only is it fun but other then buying markers it has saved me money. O. K. onto my Spring Joy Twinchie.
Technically a twinchie is a two by two inch creation. My base is two by two but I extended it a little bit by having butterflies on a chenille stem. I started by adhering gStudio Washi tape onto my base. Then I took the negative left over from cutting out a butterfly from confetti card which explains the dots. I eBrushed it with two different turquoise Sprectrum Noir markers. Alas I could not capture the shimmer in my photo but then I applied Liquidtex Iridescent Medium. The medium did not change the colors in anyway. It only added a nice sheen which is nice to know for future projects. After I glued the negative to my base I took a gel pen and printed Spring Joy. My letters got away from me and decided to dance which explains the i and the n.

I love how the butterflies here look. When I made the paper I didn't know what I was going to use it for. They are stamped and cut out of wax paper which had white school glue painted on it. Then the glue was eBrushed. The specks are pieces of glitter as I sprinkled glitter on the glue before adhering torn pieces of  facial tissure.. I don't know who makes the butterfly stamp or even if it is still available. I stamped with Ranger black archival ink  on the tissue paper side and then cut my  butterflies out. I also stamped some on the wax paper side. Either way will work depending on the look you are after. On the wax paper side the glitter really shows through. I took a chenille stem and bent it and glued my butterflies to it. I played with wire first but  decided I liked the chenille stems better. I thought of eBrushing the chenille stems but decided to leave them white since the washi tape has white in it..

The twinchie challenge ends Sunday and I don't know if I'll enter a couple others or not. I have some ideas. I have to admit that it would be more fun than clearing out my file cabinet so it can be moved to another room. ;-)

Wishing you Happy Frugal Crafting till we meet again!

Altered Playing Card Challenge Week 25

Here we are in week 25 I believe of the altered playing card challenge. This challenge I had some things go wrong but that is why it is a challenge.  It was fun to play with coloring with different mediums as well as experiment even though stenciling with gouache did not work nor did metallic mixative show up after I stenciled. Thank goodness alcohol blender helped me to salvage my black glossy card but it wasn't pretty as it was. The technique this week was to use reinkers and glossy card. Well I don't have reinkers so it was alcohol ink to the rescue. Here are Claudine's cards.


And here are mine:
For this card I already had the background made. I made it when I was playing with alcohol ink and blending solution on a blending tool and photo paper for another project. There was a big enough piece left over to fit on my playing card. 

The sun was stamped on tissue wrapping paper and Liquitex Iridescent Medium brushed on it. The butterfly was stamped on wax paper which had glue painted on it and then colored using my airbrush. Then facial tissue torn and put in the wet glue. 

The sentiment was printed with a label maker. I bought the tape for someone to use in a photo album but they decided to use the clear. I figured that black would not show up.  The Narcissus is stamped and colored with gouache paint. The grass was cut with my Cameo and colored with an airbrush. I curled it a little bit with a pencil. My cute gnome is from an online coloring page site where you can download different images to color. I had fun coloring him with pencils.

This one I used glossy black and loved how alcohol ink and the silver metalic mixative worked with it. Alas I ended up having to take a blending tool with alcohol solution after messing it up with gouache paint. I ended up using Brilliance Ink with my star stencil. The gold didn't show up so I used Red Gold and Silver. 

The Angel is a Silhouette cutting file. I cut out a solid angel and used the airbrush to color the wings and halo I colored her face,hands and the cut out part of wings and halo with colored pencils. Then I used on the cutout wings and halo a GellyRoll clear glitter pen. The dress was painted with Spun Sugar Distress Ink.  It is really easy to paint with dye inks stamp on a shiny surface the ink pad and then use a wet brush to pick up the ink. The Distress ink seems to give more of a mottled look. I used gel pens to draw in the eyes and mouth.

I was thinking of how when I look at the stars I think of people who I love who are no longer here on earth so decided to use this sentiment. I used a white gel pen to write it on a piece of tracing paper. I was afraid I was going to mess up writing directly on the card. I then edged the card with gold tape.

I'm still busy organizing and have a literature sorter coming next week. My file cabinet was not working for holding my letter size card stock and colored copy paper. Also if I can easily see what colors I have I will be more apt to use them. Not to mention that they will add some color to an apartment white room. I have found a place for the file cabinet in another room. :-)

Today the sun is out so I'm off to take my boys on a walk to the park. Wishing you Happy Frugal Crafting till we meet again!


Friday, March 6, 2015

Shabby Chic Cantilevered Card St. Patrick

Hi everyone I hope that you had a great week. Here it is Friday already. As I was putting together this card I realized that instead of designing a cantilevered frame mat card I could have just made a square or rectangle pop up panel to put my frame mat on. Oh well now I have the file for stamping directly on or for printing directly on. Also I realized if I was going to use a background stamp on the pop up panel it would be better to stamp on the card stock before cutting out the panel or to at least not fold the panel first. My stamp both times got hung up in the folds giving me this shabby look. I decided to let it be and not cut out a new pop up panel. Here is my shabby chic card that finally once I got my printer re-installed and the print head cleaned got done. Orange just won't  do for St. Paddy's.
 Once I had the pop up panel cut out I used my eBrush to color it since it was cut out of white card stock. Then I decided to use a background stamp by Ditto on it. Alas I had folded the panel already to see if it was going to pop up correctly.  Also for some reason the iridescent paint I had added to the gouache I stamped with didn't show up here.  I think using a brayer to add the paint  to the stamp instead of directly dipping the stamp into the gouache made the difference as the shimmer showed up on my sample. At least now I know I can stamp with my gouache paints. If you are going to use gouache paints to stamp with remember like dye inks they are usually not waterproof.

Originally I was just going to stamp on the frame mat using my music background stamp. (By the way this came from a frame file from the Silhouette store. Frame inserts can be great for stamping on or using another way.)  Instead I found this neat piece of sheet music so used it as a pattern fill in Studio.. After it was printed and cut out I edged it with Vintage Photo ink and while the ink was still out edged my popup panel.  I believe the image of the gentleman is from Graphic Fairy as I downloaded a lot of St. Patrick images from there a few years back.  Once I finally got my printer to print correctly I cut him out by hand because for some reason my Cameo kept cutting off no matter where I placed him on the work space.. Even when I placed him separate from the mat frame. I now have lots of white scrap to use. :-(

To put the gentleman on the card I used a trick a friend of mine showed me. I glued his feet down but used an adesive square further up on his body so it would look like he was actually bowing. For those who might be worried about extra postage for mailing a card like this it all folds flat in the envelope and doesn't come to life until the recipient takes it out of the envelope. These days given the cost of postage that may be something to consider.

I think Mother Nature is teasing us but the weather has been sweater weather today so instead of spending time crafting I took my dogs on a long walk. If the weather stays this way I'll go on a picnic with family this weekend.

I love my time spent crafting  indoors but I also love my time spent outdoors. In fact before too long I'll be doing some of my crafting outdoors on the patio table. As well as taking photos wildflowers, etc. on my walks.

Do you craft strictly indoors or do you like to do some of your crafting outdoors when the weather is nice?

Wishing you Happy Frugal Crafting till we meet again!


Tuesday, March 3, 2015

Twinchies eBrush Challenge

Hi everyone I don't know about you but I'm getting really ready for Spring. Yesterday it snowed but luckily it did not stick. Also I'm ready to challenge myself more although I think in the process my hair is turning gray. At least I'm not pulling it out. ;-) As I think I mentioned before one of my goals for this year is to try new things and to get outside of my comfort zone. Wow! I thought working in miniature on altered playing cards was a challenge. Try putting together a creation on a two by two inch base, When I saw on the eBrush facebook group this challenge I just knew I would have to see what I could do. If you have an eBrush and are on facebook you are more than welcome to join in the challenge here:.https://www.facebook.com/groups/1494321010779881/

Another facebook group I'm involved in is Everyday Moodling 50 Challenges in 2015. The challenge this week is to use vellum. You may want to check out the Everyday Moodling blog as it is a free class.  On the blog the inspiration projects are shown as well as if you sign up for the newsletter you will receive a link to the video showing how the projects were done. O.K. enough yapping and on to the unveiling of my first every Twinchie.
 First off I created the background for my Twinchie. I now have extra to use for other things.:-) This is what I call faux texture vellum. I've never seen this done before but that doesn't mean that someone has not already done it. I decided to experiment and to see if school gel glue could be colored with my eBrush.

I started out by painting gel glue on wax paper and then while still wet used my eBrush with Spectrum Noir markers to color it. (If you don't have an eBrush color mists will work or you can color the glue before painting it on.). While the glue was still wet I adhered a paper towel I had separated so it was single ply. You can also use facial tissue, napkins, etc. for this technique. On my second piece I used white glue, glitter and torn facial tissue. I'm sure that will show up in another project.


 Next was to create my flower. Since the other challenge is to use Vellum I took my pastel vellum and used a Sizzix flower die to cut four of the smaller flowers. I then used the ebrush to color it. Next step was to see if Porcelain-Itz-It. by Aleene's would work. I don't know if this product is still available because I bought it a couple of years ago at a thrift store and never used it. The vellum did curl and I had to manually uncurl it while still wet as it wanted to curl into itself. and hold it down on my parchment paper for a few seconds.  It caused the color to blend from the Sprectrum Noir marker but in this case that was all right. I only did one coat but could have done more. After it was dry I clipped the petals separating them and cupped each flower in my hand shaping them. Then I put glue in the center of each flower to assemble my flower. Once the flower was assembled I used a darker color of marker with the eBrush and held it from a distance to get a light mist and to edge the petals some. Then the finishing touch was to take the same dark marker and eBrush an adhesive pearl.  I love the variations of colors I got on the pearl.

 I was going to use  as a decorative border what I ended up using as a stem. A  QuickKutz die which a dear friend gave me was used for that. Although the paper was originally a strip I was playing with using dye ink and water I went ahead and eBrushed that also with a Spectrum Noir marker.


Next step in this creation was to create my butterfly. Using a Studio G clear stamp and Rangers Archival ink I stamped my butterfly on Japanese Calligraphy Paper. When I bought the paper the description said rice paper but this ended up not really being what I consider rice paper. Being a frugal person I usually use it for making prints with my Gelli Plate. However, I decided to see how it would stamp and if I could do a water technique with it. I stamped two different colors of Memento dye ink onto a vinyl placemat then I took a waterbrush to pick up the ink to use to color the butterfly. I think that I like using dye ink that way almost better than getting out the water colors.

The last part of my Twinchie is my word HOPE. I bought last year at a thrift store a used Brother Labeling machine and although I've used it I have not really played with the different functions. I now have several strips of HOPE labels.  Don't worry they won't go to waste. ;-) I decided that I liked the dot frame one the best. I think I'm going to have to see if I can buy the clear/black tape in bulk. 
There you have it my first ever Twinchie. If you have never made a Twinchie I challenge you to do so. Although at first it may seem intimidating to do so it is actually fun. I'm entering this in the floral category so I can make a Spring one. The challenge ends March 15th midnight ET time so if you have a eBrush come and join in on the fun. Also I challenge you to get out of your comfort zone and try something new. Go ahead and get messy doing a faux vellum technique. ;-) Let that inner child out to play. It keeps you young. :-)

I finally got in the mail today some more Tim Holtz Distress inks so I'm off to play. Also some Iridescence paint additive was in with the ink shipment. Can't wait to play with that since if I can add it to regular paint it will save me money. As much as I love the metallic color paints they are more expensive.. My other project is designing a cantilevered cutting file. I'm at the point now to do a test cut.

What type of things have you done with wax paper, paper towels, etc. in your crafting? Do you like to buy commercial papers, embellishments, etc. or make your own?

Wishing you Happy Frugal Crafting till we meet again and "Think Spring"

Sunday, March 1, 2015

Lady In Green Card

Hi! Can you believe that it is already March! Which means that it will soon be St. Patrick's day. There was a comment on the last post that the card looked familiar that I posted. That was because I used the same image this year as I used last year.  Ever once in awhile an image which I turned into a print and cut shows up again on a different card. This lady in green is such an image. After working to figure out how to make her pop up last year I had to use her again this year. The main different is instead of printing her directly onto the card she is cut out separately.I'm not so sure that I should have re-sized her smaller though. This is all part of the learning experience.
After my pop up panel was cut out for the second time. The first time I tried a different technique on it and it ripped. I rubbed Bamboo Shoots and New Sprout Memento ink with a blending tool. I just bought these inks and love the colors. Then taking a  Prima flourish stencil and my eBrush airbrush I used a Spectrum Noir marker for the pattern. I decided to use a yellow color underneath and it just made everything pop. I edged my lady with Vintage Photo Ink to give her more dimension. The trim is glitter tape by Studio G. Alas WalMart was sold out of it on Friday. While sorting through things I found some pages of Sentiments and images that had gotten printed out several years ago when I made over a hundred St. Patrick day cards for a retirement center. I cut one out free hand and edged it with ink.

With this view you can see how the image pops out. I saw in a book how to do this but it took me a few tries to get it correct. using the Studio software. After looking at the file I now remember how I did it so don't be surprised if you see other cantilevered cards. :-) 

That is all for now. I'm off to do my fifteen minutes of crafting for today as well as fifteen minutes of cleaning/organizing my playroom. If it is anything like yesterday it will end up being longer for both the crafting and the organizing.

Wishing you Happy Frugal Crafting till we meet again!