Monday, June 30, 2014

Hero Arts One Layer Challenge Entry

Hi readers, over at Hero Arts there is a one layer challenge for making a card. Embellishments are allowed and one Hero Arts stamp must be used. The details can be found here One layer challenge.

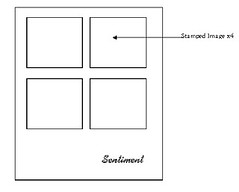
Here is the card I created for the challenge.
 Supplies used:
Canson Acrylic Card Stock
Cameo Cutting Machine
Apple Barrel China Blue and Ivory Acrylic Paint
Sea Sponge
Plastic Wrap and Large Bubble wrap
Hero Arts Poppy Background CG 140
Rangers Archival Black Ink and Stazon Teal Blue
Fine tip Sharpie Permanent Markers
Dover Sampler Image
Creative Medium Vintage
Cosmetic Sponge
American Crafts Micro beads
Scrapbooking Alphabet stickers
Hero Arts Antique Gold Embossing Powder (this is antique as I think I bought it back in the 90's)
Butterfly sticker (brand unknown)

First I cut out my card base. Then I sponged on the paint. While the paint was wet I laid plastic wrap over it and then removed it and laid large bubble wrap on top of the paint. This added texture to the card stock which already had some texture to it. When the paint was dry I first inked the stamped with the black and stamped on a piece of copy paper. Then inked with the teal blue and stamped on my card front. Then I inked once again with the teal blue and stamped again giving me a wonderful double stamped image.

I colored the flowers with a couple of yellow Sharpies and the stems with a couple of greens. When I was done coloring I adhered the print and cut image with Creative Medium. When that was dry I took my cosmetic sponge and sponged the Vintage Creative Medium over the entire front. Then I mixed on a craft mat Creative Medium and the micro beads together and applied that mixture to the center of two of the flowers.

I have had the alphabet stickers for years. I don't usually use them as I bought the pack for one particular color but usually don't use blue or pink. I decided to see if I could heat emboss them. After I adhered the letters I added the butterfly and the card was done.
Closeup of micro beads and coloring I love how it worked mixing the micro beads into a little bit of Creative Medium. It was easy to then transfer with a tiny spatula left over from the days when I demoed cosmetics. I can't wait to do this with the Shimmer but for this project the Vintage was perfect.

I hope that my friend I made this card for will like it. It was fun to challenge myself to make some single layer cards.

My frugal tip is to get out those stickers especially the alphabet ones you don't use because they are mismatched and do something with them. Heat emboss them,paint them,stamp on them or even use them as a stencil. Don't let them linger in a drawer.

Wishing you Happy Frugal Crafting till we meet again!

Sunday, June 29, 2014

Acrylic Paint Poppy Card

Good Day!

Hero Arts is having a one layer card challenge. I decided to challenge myself to see what I could do. This is my prototype Now that I know this technique works with this stamp I will be making a card for the challenge.The card will be a little different. The challenge is open until sometime in August. You can get details on their blog.
I started out by drawing a circle in Studio and duplicating and welding to make my card. I then cut off the bottom of the circle. Once I got my card base done the fun began.

With the card base opened I sponged heavily Folk Art metallic aqua and China Blue paint made by a different company. I'm too lazy to go see what company. Then I wrinkled up plastic wrap and placed it in the wet paint. I let it sit for a minute but you don't want the plastic wrap to sit too long in acrylic paint or you will be lifting up the paint when you remove the plastic. I love the texture that resulted. You can also get some neat results using different sizes of bubbles bubble wrap.

Once the paint was dried I inked up Hero Arts Poppy Background. I had bought the stamp this Spring on sale but never used it. Alas it looks like the stamp may have already been discontinued even though it came out in 2012.  I used Teal Blue Stazon ink. The background of the stamp is actually smooth with the flowers and stem cut in like an linoleum print block.  The texture from the paint turned the background into something more interesting. Some stamps would probably work better than other stamps for stamping over your textured background. Sometimes it is trial and error to see what works. Of course you could always carve in a potato and make your own stamp if you don't mind sacrificing one.

The lovely lady is a Dover sample.  I took her into a graphic program and converted her from black and white to Sepia.  After she was converted to a cutting file I printed her on copy paper and let my machine go to work cutting her out. I glued her down with a generous amount of Vintage Creative Medium.  Then when she was dry I coated the whole card front with the Creative Medium using a cosmetic sponge. I am pleased
the way she looks like she was printed on the background.

I decided to go and edge where it was blank as the stamp is smaller than my circle with a gold Painters marker.  I had thought of edging the whole circle but decided not to.

Have you used acrylic paint on a card front? I spend less than a dollar on bottles of craft paint and can get the color I want when crafting instead of having to have a bunch of different colors of card stock. The paints last a long time and dare I confess that some bottles of paint I've had for over ten years and they are still good.

The sunshine is calling so I'm off to play in the sun. Thanks for stopping by. Wishing you Happy Frugal Crafting till we meet again!

Friday, June 27, 2014

Dr. Who Birthday Card

Hi everyone I have a fun card to share with you today. For those who do not know Dr. Who is a character in a British television show that has been around for fifty years. The Doctor as he is called is a time lord and can travel across time and space. My son was deprived as we never had cable while he was growing up. However we did have a television and could get British Broadcasting shows which I allowed my son to watch. Dr. Who was one of those shows which we would watch together. To this day he is still a Dr. Who fan and I've teased him that one of these days I'm going to find the Tardis in his living room. For his birthday I decided to make him a Dr. Who card.
Roni at Inkstains with Roni generously shared the template that I used to make the card base. I cut out separate panels for the front since I wanted to pull prints as well as emboss one panel.  I used the grunge technique to pull the prints for the panels. Then I stenciled with a Plaid stencil I bought at a thrift store the outer space images on one panel. The only reason I bought the stencil is it was packaged with a stencil I wanted.  Then I glued some star gems that I have had for a few years.

 The other panel I embossed with a Teresa Collins embossing folder. After it was embossed I sanded revealing the white card stock.

The cording is glued between the card base and the panels.

On the left and right panels I rubbed two different blue oil pastels over a embossing folder. I was getting to much of the flowers and stems showing so I moved where the card stock was on the folder.

The sun is from the stencil I used on the front. I masked off the rest of the stencil with painters tape. I stenciled with acrylic paints and a cosmetic sponge.

The cupcake is from a Birthday stamp set which I had bought at a thrift store and forgotten about. It is stamped with teal blue Stazon ink on a piece of plastic. Then cut out by hand and painted on the back side.

The sentiments were printed on clear tape with black using my label maker. I was going to use silver with gold but decided that I liked the clear better.

Dr. Who on the center panel is a print and cut which was then transferred onto canvas using Creative Medium. I found the image online and then had to make changes in PhotoShop Elements so that I could cut around him using my Cameo.  I don't know if I didn't have the image adhered tight enough to the canvas or if because I printed on card stock instead of copy paper that I didn't get a clear image. Anyway he lost some of his outfit when I rubbed the backing off. I used Dimensional Magic for his sun glasses and defined them more using a gel pen for the frame. The Tardis was printed on copy paper. The ribbon and bow is painted with dimensional paint.

Before rubbing the backing off of the Dr. Who image I dabbed on with a sponge brush Folk Art Metallic Sapphire Blue and Aqua paint on the canvas.

The balloons were a free Silhouette cutting file. Because it would be too much work to cut the white out in between the strings I cut the strings off and glued crotchet thread for strings. Then tied them together with scrapper floss. I used Dimensional Magic on the balloons. When they were dried I pop dotted the balloons section.

I left room on the panel with the cupcake to write a personal message.I hope he likes his Dr. Who birthday card. If not at least I had fun making it for him.

Do you or someone you know have a favorite television show which it would be fun to make a card using it as a theme?

Thank you for stopping by and leaving comments. Wishing you Happy Frugal Crafting till we meet again!

Wednesday, June 25, 2014

Creative Medium Play And Cards

Hi everyone, I hope you are having a great week. Roni at Inkstains with Roni introduced me to Creative Medium through her blog. When I saw that it could be used with inkjet prints I just had to have some. Alas it did not come until Friday and I was getting ready to go see my sister so it had to wait until this week.

Of course now after using it I now have to go and order the Shimmer. I bought the Vintage. Right now through Amazon the Vintage is an add on product so if you want to spend over $25 you can get it for $2.27 which is a bargain. Since I needed to buy ink for my printer and it is considerably less through Amazon I saved a lot of money. Not only did I get my ink for $20 less but I got a lot of crafting goodies that I've been wanting to try. If you can afford to spend over $25 do look for the add on products if you want to try things but not necessarily pay the full price.

I decided to go with a Dover Sampler image that has really vivid colors. I figured the Vintage would mute them.


For this card I brushed the Creative Medium over my print which was printed on copy paper. I used a foam brush and got brush strokes  but I like the effect. I was surprised at how fast this dried and it did not buckle the paper like Mod Podge has done on me. Nor does it have a tacky feel to it. It does have a little bit of a sheen to it. The directions said to use "Ink Blushers" with it so perhaps there would not be the brush strokes.  I have more experimenting to do with applying it using different things.

I decided to mat the image with black card stock before putting it on my sage green blank card.

 The first thing you will notice looking at this next card is that the image is reversed. That is because I transferred the image onto a piece of canvas. I've tried before doing image transfers with inkjet prints and it has been disappointing to say the least. I am so pleased the way this turned out. I brushed the image on the printed side with a generous layer of the Creative Medium.  Then placed it glue side down on the canvas. I smoothed it out with my hand and then ran my brayer over it several times to make sure it was down tight.  You need to make sure that there are no air bubbles or loose places or the image will not transfer. Then comes the time to be patient and wait until it is totally dry.


Once it is totally dry wet with a finger the back and carefully start rubbing off the paper.  I would rub and then let it dry and then wet and rub again until I was pleased with the way it looks. A tip that Roni gave that really helped was to then brush the medium over your piece. Not only does this seal your image but it also will make any white haze disappear.

I cut the frame out with my Cameo and then brushed a brown paint over it and once that was dry I brushed a Walnut Gel Stain over to give the frame a wood look.  I forgot to change the blade depth so the one corner of the frame got mangled a little bit when it cut but since this is Vintage I didn't go and cut another one out before painting.

I played with a label maker I bought at a thrift store and printed the sentiment using the clear with black print tape.

 This is a closeup of it where you can see the texture better. I am so excited about the possibilities of transferring onto other materials ink jet prints. If you want something which is machine washable you will still need to do heat transfers but this is a neat way to transfer an image onto a card or layout. Especially if you want to transfer an image onto something which will not fit into your printer.

I give Imagine Craft Creative Medium a four star rating. It is easy to use, easy to clean up, affordable even if paying full retail price and quick drying. Besides the Vintage and Shimmer it also comes in a Matte formula.

For those who are wondering I had a wonderful weekend playing with my sister. I did a lot of embossing of things for her. As well as showed her some of the things that can be done with gelatos. Since they don't  own a television we spent Saturday night having a looming party while we worked on knitting hats on looms. Lol! Knitting on a loom may just become my next addiction and I definitely am going to take more time to unplug from all electronic equipment.

Thank you for stopping by. Wishing you Happy Frugal Crafting till we meet again!


Thursday, June 19, 2014

Wallpaper Panel Card

Good day! Hope all is well in your world. My laptop keyboard died on me yesterday so I had to resurrect my old computer with Vista on it. It is always nice to have a backup. :-)

Several months ago I bought a roll of texture wallpaper at a thrift store. I happened to find a roll with panels which are almost the perfect size for a standard 4 1/4 by 5 1/2 card. I was going to color it with watercolor paint until I bought myself gelatos. I'm having so much fun using them along with the Inka Gold that I found in a clearance aisle.Reminder to self don't forget to check out the clearance aisles.

This is what it looks like still on the roll. There are lots of different patterns out there this just happened to be what the thrift store had. I'm too cheap to pay full retail price.


And here is my card


I used Inka Gold for the outside trim of the panel. Where the blue is I wet a brush and wiped it over the gelato stick and then brushed it on. The green was scribbled on and the blended with my finger. Using a wallpaper panel like this makes for a quick card.

Thank you for stopping by and leaving comments. I am off to finish packing craft supplies for a play date with my sister. I'm so excited. Wishing you Happy Frugal Crafting till we meet again!


Sunday, June 15, 2014

Twins Quick Cards

Hi readers Roni had on her blog back in 2007 some quick Christmas cards and I decide to try one of the ideas. Although instead of using scissors I used my Cameo. Also I decided to go more decorative.

Lol! I spent more time playing around to see if I could stamp with a combination of Inka Gold and a Gelato than I did cutting my twin panels and cutting out the stamped image with a die.

I started by cutting out my two rounded corner card bases. For some reason the first card base cut a little rough leaving some ragged edges so I decided to distress the edges with the edge of my scissors for both of them.

Then in the Designer Edition of Studio I drew a rectangle the size I wanted it to be. I then took the knife tool and the wave pattern to cut the rectangle into two sections. I decided to cut the wave pattern off center so one panel would be wider than the other.

I decided to go ahead and use some monotypes I had made on copy paper. The blue print was made using metallic paint and the butterfly stamp. I made that one last year on my homemade gelli plate. The green one was actually a piece of copy paper I had placed down on my round gelli plate to clean it. When I cut it I got the rounded edge in one corner but I like it.

Several people have asked me about the butterfly stamp because it seems to find its way onto a lot of cards. I must confess it is my favorite stamp. As well as the first non Christmas stamps that I bought. The stamp is by "Funny Business Stamp Company". They were a stamp company based in Seattle Washington but I could not find out if they are still in business or not. The copyright on the stamp is 1981 so I guess it could be considered a vintage stamp by now.

I decided to see if I could stamp with a combination of Inka Gold and a gelato. I knew that I could mix Inka Gold with water on a craft mat and then stamp but decided to see if I could apply Inka Gold directly to a stamp and spritz once with water and then stamp. Then I decided to see if I could color over the Inka Gold with the gelato and then spritz and stamp. I wasn't worried about contaminating the gelato because I knew it would wipe clean. My results varied depending on how heavy both the Inka Gold and gelato were applied as well as how wet. On the second butterfly I rubbed my finger over the stamp after I had spritzed it so it gave the stamp more of a water color look.


I cut out the stamped images with a Spellbinder die. Glued everything down and there you have it two quick cards. You might want to keep this idea in mind if you need to make a lot of invitations or holiday cards.Using two different pattern papers you could quickly make cards.

Thank you for stopping by. I don't know when next I'll post as I have some new goodies coming in the mail so I'll be busy playing with those. As well as I just might go and have a Play Date for a few days with my sister. I have all kinds of techniques to teach her and products to introduce her to.
Wishing you Happy Frugal Crafting till we meet again!

Wednesday, June 11, 2014

Card Sketch #1

Hi readers, yesterday was a good day for crafting. I started to walk to the park with the boys but the rain started and the wind really started blowing so we scurried home. I decided to finish coloring my stamped image with water color pencils and put together a card.

Normally I don't do card sketches but one of the things I've made for a goal is to challenge myself to do something I normally don't do. I started reading some of  Roni's old posts from her blog Ink Stains with Roni and she had this card sketch.
Using this sketch as a jump start point I came up with this card. You will notice that I decided to not go with rectangles.
 The first thing I did was create my cutting file. I started off by making a panel with the cutout ovals. Originally I was going to glue my plastic with the stamp image right on a blank card base. I decided instead though to make a corresponding card base. I didn't take into consideration that welding a cutout panel and a rectangle in Studio would make a slight difference in the size so the cutout panel and the front would not both be the same size. However, I like the way the inside panel peeks out on the front. Of course Cameron was happy to get to cut out the cut out panel and the card base.

To make the media for stamping on I took a piece of plastic and glued with acrylic floor wax a check napkin I had separated onto it. The napkin wrinkled when I put it onto the plastic but that was no big deal.When it was dried I placed my cut out panel over the plastic side using it as a guide of where to stamp and stamped in the openings. I could not find on the stamp who made it but it is an old rubber stamp I have had for a long time. Once the Stazon ink was dry I turned it over and colored in  the stamped image with water color pencils. Then I put my card together using a dot tape runner.

I stamped on a scrap on the napkin side my sentiment. Then cut it out free hand to fit. I could have just as easily stamped right on the card front but you know me I'm always afraid of messing something up when I stamp. Besides I think it pulls everything together.

I decided to add a fun detail to the inside panel by embossing it with  my Swiss Dots folder.

By using cutouts on the front and on the inside panel there is a stain glass look on the front.

Do you like to use card sketches when making cards? Do you like to use things like napkins which are usually throwaways?

Thanks for stopping by! Wishing you Happy Frugal Crafting till we meet again!


Monday, June 9, 2014

Hello Card With Monoprint Background

Hi dear readers I'm glad you could drop by today. Today I have a card to share using a monoprint background I made using my gelli plate over the weekend. I am not as pleased as I could be on how the sentiment turned out but used it anyway. I think the letters were too thin and too tiny but on the whole I like how this card turned out. Of course Cameron my Cameo was happy as he actually got to do some cutting.

The card base I had cut out to use for the card in the previous post but it was the wrong color. I decided since at the same time I had cut out the bird and the banner to go ahead and use it on this card.

The background paper was created using a round gelli plate. Later on I'm sure I'll use the pieces I trimmed off. After pulling a bunch of prints on white cardstock and some of the paint was dry on the plate I went and brushed with a foam brush purple over the plate. I then took a stencil which was covered in paint and placed it on the plate and then removed it. Then I placed a black insert from a page protector on my plate and pulled my print.I love the light airy look that resulted. This is the fun of pulling prints as you never know for sure what you are going to get.
The bird was originally a Silhouette print and cut. I believe at one time it was a free file or it came with my Cameo. I decided to use it as a cut file.  I didn't like the first two colors I had used of gelatos on the bird so started playing mixing and blending colors until I ended up with this brass look. I used the orange to color the beak. A marker to make the eye and the bird was done. Except it looked blah to me.  On my desk was a bamboo stamp by Judkins which I had bought at a thrift store. I don't know if the stamp is still available as it is an older stamp. I decided to see if I could stamp over the gelato which is sort of waxy like chapstick. My Stazon  ink worked.

The "HELLO" banner was part of a tag which was a freebie from Silhouette. The "Hello had been at the end of the tag but I centered the words and then resized to fit on the bird. Originally I was going to put the banner directly on the bird but decided instead to back it with a scrap from the black.

My frugal tip is to use cheap paints for pulling prints. I actually found that the craft paints had a longer drying time than the artist grade paints so didn't dry too quickly on the plate. I did at the thrift store pick up a bottle of extender which slows down the drying so I can use my metallic acrylic paints.

Thank you for stopping by. I hope you have enjoyed your visit here and maybe even been inspired to get "painty" and "inky". I'm off to follow the advice for artists that while people are criticizing or praising your recent work you should be creating new work. Wishing you Happy Frugal Crafting till we meet again!


Sunday, June 8, 2014

Garden Background Stamp Card

Hi readers I have been busy cleaning off my work space as well as the rest of my craft room. It is a daunting task. It is also fun as I find things I've forgotten that I bought or even gifts from friends.

I had placed this stamp a friend gave me the first of the year on my work space planning to use it but alas it got buried under a mountain of scrap paper. Of course there was also a good size of plastic which I had cut from the page protector in that stack. I love how this turned out. I did use glue instead of floor wax but the glue has some drawbacks which I'll talk about later on in this post.
I started by stamping with my Garden Background stamp by Stampendous using Stazon Royal Purple Ink. When stamping on plastic you need an ink like Stazon. I have not tried my Ranger Archival ink yet on plastic but that might work. I also have not tried to heat emboss on this plastic. I have heat embossed on transparencies but they are expensive.

I waited a few minutes to make sure the ink was dry. It can take up to five minutes stamping on this plastic where inkjet transparencies is almost instant. Then turned the plastic over and this time I brushed white glue on the plastic. Then I placed a single ply sheet of facial tissue in the glue. Although the glue works I noticed there was more of a tendency for the facial tissue to tear when trying to gently push it down with a foam brush onto the plastic.

You will want to make sure the glue is dry before scribbling with gelatos or you will tear the tissue. You do not need to scribble all the way to the edge of your stamped image because when you mist the mist is going to spread the color.

I wanted to do a closeup to show you the texture you get from using the facial tissue. That white spot on the flower is a reflection from the window. :-(  No matter where I seemed to put this card to take a photo I was getting a reflection when trying for a closeup. I probably could have gotten a better picture if I had more patience which is not my strength.

You will notice that in places the colors bled outside the stamped lines for me it was no big deal. Lol! But then even as a child I never colored within the lines. I wanted to blend colors more on the flower however I discovered that because I used glue instead of floor wax that I had to be really careful blending the colors. If you don't have gelatos I'm pretty sure that watercolor markers would work. That is an experiment for another day.

Since I had decided to cut out a scallop card base I decided to cut down my stamped image using my scallop scissors. I had bought the scissors years ago before I even had a cutting machine and usually they just take up space in a drawer.

Originally I had cut my card base out of Kraft cardstock. However, I did not like the way it looked. Oh well it will be used for another project. Then while filing my scrap paper there was this piece of blue 12x12 which I had previously cut a card base out of. There was just enough of the card stock to cut out my base. Remember if you do this technique that whatever color you place your stamped image on is going to show through as this image is semi-transparent.

When gluing this down there is no redo like there may be in some other projects. Also you are going to have to take into account that like adhering vellum what you use may show. I used a dot tape runner. However, I found that adhering the tissue with glue there was once again a tendency to try to tear which I did not have when I used the floor wax.

My conclusion is that you can use glue for this technique but it is not as satisfactory as using an acrylic floor wax. I do have some vintage mod podge which appears to still be good. Lol! And it is "Vintage" as I bought it ten years ago for a project. I am going to be trying that for this technique and getting back to you.

If you decide to try this technique you may decide to use the facial tissue side instead of the plastic side. I have to admit I was torn about which side to use when I made this card.

In the meantime I have some prints I made using my new round "Gelli Plate" I want to use on cards. Yes, I know I'm all about frugal crafting but it  is Roni's fault over at Ink Stains. Last month she had several posts on prints using a gelli plate. When my "material girl" saw those posts she had to go and order one from Amazon. ;-)

I'm off to doing more play and more cleaning. Who knows what treasures I may uncover. Wishing you Happy Frugal Crafting till we meet again!


Saturday, June 7, 2014

Plastic Embossing and Gelato Play

Greetings my dear readers. Can you believe another posting today! I was so excited at how these cards turned out that I couldn't wait to share them with you. I only wish I could have gotten photos that did them justice. First off is a card I ended up using the debossed side as I liked it better when I got through playing. The tissue paper I used was too dark and although you could see the glitter on the embossed side it was the same color as the tissue paper even though I used greens and gold fine glitter.

I started out by embossing a page protector using Stylized Flowers by Cuddlebug. After embossing I brush Pledge floor wax over the embossed plastic on the debossed side. I then placed tissue paper on top. Using a sponge brush to pat it down tight and to work any air bubbles out. Then I sprinkled fine glitter randomly on top. Some places I got glitter in a few places heavier than I had wanted to but I kind of like the effect.
After the wax was dry I went and colored with different colors of gelatos the flowers and in some of the other places also. Then I used a wet sponge brush over where I colored to soften the look.


I glued this embossed panel on black paper. Then glued it on a white card blank which I had edged with a metallic paint pen. I'm a loving this card.


 Here is the second card I made. Yesterday I got in the mail a Darice Butterfly In The Corner folder. Of course I couldn't wait to do something with it. Once again I embossed on a piece of plastic from a plastic protector. This time instead of using tissue paper with the floor wax I used facial tissue which I had separated. The facial tissue wrinkled in places while I was patting it down. Although it doesn't show in the photo once again I sprinkled glitter this time a magenta color which is what the pink is in the photo.
When the wax dried I colored with gelatos on the debossed side. Because of the wrinkled tissue it was hard to see where the pattern is when I colored. Then I took a mister and misted with water. I took my finger and blended the gelatos. I cut the butterfly out and then colored it with gelatos. and then brushed with water. I used a dimensional paint on the body. I used scrapper floss for the antennae and then glued rhinestone on the floss. I love how the gelatos brought out the texture in the wrinkled facial tissue.

I had fun experimenting with embossing on plastic and trying out this technique. I've never seen this technique but got the idea from stamping on plastic and then doing the tissue paper with floor wax and glitter. Now to see if this will work white glue instead of floor wax.

Thank you for stopping by. Do come back as I plan on doing some playing with a round Geli Plate which just came in today's mail. Then sharing the results with you.

Wishing you Happy Frugal Crafting till we meet again!

Friday, June 6, 2014

Reconnecting With Nature... Mother Nature Artist

Hi my dear readers. Almost every day I go out with camera in hand and take photos of what is around me. Because of that I see things I might have missed and even traveling the same paths over and over there are new things to see. Perhaps it is the play of light and shadow or maybe the way the colors appear different depending on the lighting. Yesterday I went out with the boys (my two dogs). Usually they are patient as I snap photos but for some reason they wanted to keep moving and even tried pulling me up some rocks in search of some prey. Still I managed to snap a few photos.
I thought I had seen all the different wildflowers in the area but the gorgeous colors of these captured my eye. They look like bluebells to me. Unfortunately I did not have my book of wildflowers with me.

I wanted to get a better picture of the Queen Ann's lace but one dog was pulling me one way and the other the other way.  I have to laugh when I see them blooming as when I was a young girl I planted Queen Ann's Lace in my small garden plot only to come home and learn that my Mom had weeded them thinking they were weeds. To be honest I think she was afraid they might contaminate her immaculate gardens. Sometimes I wonder why we don't garden like Mother Nature the artist. There is such beauty in the way she combines plants,grasses,and even rocks.

Finally my boys allowed me to rest for awhile on a bench in the shade. The play of the shadows intrigued me as did the fallen log laying like someone had laid it on purpose on top of the rock. Proof again that Mother Nature is an artist and that beauty is all around us if only we look for it.

I am linking this with Reconnecting With Nature. Do check out some of the other photos if you get the chance.Reconnecting With Nature

Blessing till we meet again!

Happiness Card

Hi readers! Has Summer come to your part of the world yet? It is definitely Summer here but at least not humid so I can stand the hotter temperatures. The weather has been so nice I already have little green tomatoes. The lettuce has gone crazy in pots and needs to be harvested but the peas don't seem to like this hotter weather. The weather went pretty much from Winter into Summer.

O.K I know I talk about being frugal here but ever once in awhile the "Material Girl" raises her head and won't be satisfied until I buy her some things.  Most of what I buy is at thrift stores like the oil pastels and one of the stencils I used on this card. However, with gelatos showing up being used in so many projects I could not resist buying some metallic ones. Then today in the mail came a kit with gelatos and another goodie. :-) Anyway here is a card I made from my experiments.
 The blue at the top is where I used a mini honeycomb stencil with a  blue gelato stick and water on a piece of scrap white cardstock. I was a little heavy handed scribbling the gelato over the stencil. Also it was only near the bottom of the cardstock where I had the perfect amount of water on my brush where the color didn't totally bleed under the stencil. You know what they say about practice makes perfect.

The "happiness" is from a stamp set. Because I did not want to cover up the stenciled design and don't like to stamp directly on something in case I mess up I stamped on packing tape using Stazon ink. I first stamped using Cherry Pink but alas it was too light of a color. I decided that the Teal color probably would not show either. Since I don't have a Black Stazon pad I went with the Royal Purple.
The black here is actually from inside a page protector. I bought a box of 100 for $2.50 at the thrift store this week. I didn't have any black cardstock so thought I would try an insert. :-) The design is a Plaid stencil I bought at the thrift store for a quarter. I rubbed three different colors of oil pastels over the stencil and then while the stencil was still on the black rubbed with my fingers. After taking the stencil off I took a gelato and rubbed a wet brush over it and then brushed the color on the black over my stenciling. Alas I could not pick up the shimmer in my photo. The blue,pink and purple colors didn't really show on the black but it did give a nice silver shimmer.

The image is one I downloaded from Dover some time ago. It actually was a yellow color but through the magic of my printer I was able to turn it into a monochromatic print. I didn't realize but somehow after I printed it and before I cut it with my Cameo I moved the image on the workspace a hair. This left a small white edge. Normally I would have edged the entire image with ink because it gives a nice dimension. This time though I decided to paint just the one edge with purple dimensional fabric paint.  After the paint was dry I pop dotted it on the black panel.

There you have it my experiment with stencils using oil pastels and gelato sticks. I have done more experimenting with the gelato sticks and using plastic page protectors. I can't wait to share my experiments with you. I love the other card I finished today but want to wait until I can finish the second card to share both of them in the same post.  I'll give you a hint they also use tissue paper or facial tissue and floor wax. Lol! My friend who has been visiting saw me brushing on the floor wax and commented that he was wondering why I had floor wax on hand since he has never seen me wax floors. I bought the floor wax to make Christmas ornaments and no sense in just tossing it out. I do want to see if this technique would also work with white glue since I know not everyone would want to go out and buy the floor wax for crafting.

Off to see if things have dried so I can craft some more. If not maybe I'll go and play with my other new toy that came today. Oh, if you live in the U.S. and would like to try your hand at gelatos Amazon has a kit for under $20 with ten gelato sticks and lots of other goodies including a 24 page booklet. If you order $35 of eligible products  you get free shipping but even if you don't the shipping is reasonable and you will spend less than the retail price.

Wishing you Happy Frugal Crafting till we meet again!


Monday, June 2, 2014

Reconnecting With Nature In Spokane While Revisiting The Fair Grounds


 Hi my dear readers. Sunday was a gorgeous day so the boys and I hopped into the car and went on an adventure traveling over the State Line to Spokane. This year Spokane is celebrating the 40 year anniversary of the World's Fair. It does not seem like it was that long ago that with my young guide I toured the fair grounds. Even though I'm terrified of heights he got me to take the ride over Spokane Falls which most of these photos will be of.  Although this time they were taken with my feet firmly planted on the ground. Grab yourself something to drink and a snack to eat and go on this photo journey with me. There are a lot of photos but I did thin them down from a hundred.  When you are done with this journey head on over to Reconnect with nature one photograph at a time where there are several links of beautiful photos.

I believe this is the lower Spokane Falls. One side of the road is lower and the other side is upper.  To me not as spectacular as the upper falls where you can take cars which go on a cable in the air across the falls.

The pictures below were taken of the upper falls at different angles and different places along the paths.


I thought it was interesting in this area to see a sign stating that there is a restoration project in place. They are taking out the non-native plants and replacing with plants native to the area. The theme of the fair was environment so this fits in with that theme.


These next few pictures were taken looking over the edge of a bridge railing. I was really wishing the railing was a little higher as it is a long ways down if I got dizzy and fell over. I used the zoom on my camera to get these shots.


It is amazing to me to see shrubs and trees growing through the cracks of rocks in the water.

Finally off the bridge and on pavement again so I can breathe easier.


Wire structure  in the background is the Pavilion from the World's Fair. During the World's fair it was covered in canvas and if I remember correctly covered in lights. At that time it housed the IMax theater which has since been moved to another location.

For some reason the sidewalk was locked so had to take this from behind the railing of the blue bridge zooming in.

My boys in the Spokane River cooling off.  Buddy shaking the water off his fur.
I love the texture of this old stump and it reminds me that aging can be beautiful

Spokane is the city of lilacs so no journey would be complete without a photo of the lilacs in bloom. I love the heady fragrance and was pleased that I could enjoy the fragrance on this trip.

Sculptors commemorating the workers who built Spokane. The fence in the background is metal.


From a distance I thought this was actually a workman hauling bricks. Of course I had the sun in my eyes.

The Spokane River was full of different birds. These were in an area where there were less people. Maybe they were looking for a little oasis of calm like me.


Of course any journey would not be complete without one last look at the clock tower prominent part of the landscape. It originally was part of a Great Northern depot which was demolished for Expo 74. That was our meeting spot to head home at the end of the day at the World's Fair. With my mental scrapbook bulging at the seams with old and new memories it is time to head home. And just in time as leaving the city raindrops started falling.

On the way home I was thinking how lucky I've been to have had the opportunity to go to three World Fairs in my lifetime. I skipped school to go to the Seattle World's Fair before it closed. Then I was able to go to the Spokane World's Fair and the World's Fair in Vancouver British Columbia. Hopefully Minnesota will win the bid so I can travel to that one in 2022 or 2023 as that looks like the next proposed one in the U.S.

The next World Fair will be in Milan Italy. Maybe I should start saving my pennies to go. ;-) In the meantime I hope you have enjoyed seeing part of the fair grounds and the nature that exists there. As well as some of the art work.

Blessing till we meet again!