Monday, October 28, 2013

Thanksgiving Joys

When I was going through my Thanksgiving images I wasn't sure how I was going to use this image from Dover Publications. Then when I received a shipment with tons of  brown packing paper wrapped around the item and saw in one of the decorating books where leaves where used for a decorative paper I knew.
On the card base I used the border from a frame stamp I bought at a thrift store near the top. The stamp ended up being larger than I make cards and so I've never used it. :-( I used red gold ink and it ended up being really subtle.

The background the image is on is from the brown packing paper. I gathered  leaves that were not dried up yet.   I first mixed metallic orange and copper paint and painted on the  leaves vein side.  I then painted some leaves with red which I mixed with the orange. With my brayer I smoothed the leaves down. I went ahead and overlapped the leaves. So it looks more like a pile of leaves than individual leaves. The packing paper was already wrinkled but after the paint was dried I crumpled it up into a ball and then unfolded it. Then with a cotton ball and vintage photo distress ink I rubbed ink on my background.

I have all of this ribbon that I seldom use so I decided to go ahead and glue ribbon for a border on three sides. I figured that adding ribbon this way would not add a lot of bulk to the card for mailing purposes.

I edged the image with red gold ink. I had taken the sentiment and cut an extra one of those out. I did not like the purple hue to it so used yellow and cinnamon chalk on it. Then I edged it with gold ink and pop dotted it on top of the sentiment on the image.

The leaves have all been raked up but hopefully I will be able to collect some more for another idea I have.

Alas I forgot to take my camera over to my son's house as I was going to post some pictures of Ali decorating a gourd for Halloween. Opps! I had forgotten to take a brush over for her to brush gesso on the gourd so she ended up using her fingers. I even got my son involved as I had him dry the gesso with their hair dryer. Anyway it is the scariest looking ghost gourd I've ever seen.

Wishing those who celebrate Halloween Happy Halloween! For the rest wishing you Happy Frugal Crafting till we meet again!


Friday, October 25, 2013

Marie Nutcracker Birthday Card

My "Bug" is turning three next month. Where did time go? Seems like just yesterday I was driving over to visit her as a baby. Anyway "Bug" has dancing in her soul and is definitely what I call a "free spirit". When she is home the only way her mom can launder the tutu is to grab it while "Bug" is in the tub. "Bug" lives for the days when she has dance. Oh and did I mention that she is very much a girly girl unlike her older sister.

I was trying to decide what to get her for her birthday as well as what to make her for a card. I figured the "Nutcracker" book would be too advanced for her and I didn't think she would sit still long enough to watch the "Nutcracker" on television if I got a DVD of it. Then I discovered that Susan Jeffers has illustrated the "Nutcracker" with minimal text. Being familiar with the illustrations that Susan Jeffers does I decided that is what I will get her for her birthday. In the book it is Marie which I think is the name in the original version but in the ballet at least the West Coast version I saw it is Clara.

Well to make a long story short when I was going through my massive collection of graphics from Dover Publication I came across images from the "Nutcracker". Then while looking through the book "Handmade Greeting Cards" I saw a beautiful card using triangles and loved the way they used them. From there the card pretty much made itself.
I used the knife tool in Studio Designer Edition to make the edge. The pink showing is actually another card base cut from shimmer card stock glued inside.The background of the card base is from Free Vector Graphics. I opened it up in Photoshop Elements and because I'm  lazy I did a copy in PE and paste in Studio. Once in Studio using the fill pattern option I mirrored it horizontally as I wanted the butterfly on the right. Marie is a print cut from the image I had on hand. The butterflies dancing around with her are cut from the background image and resized to fit. The sentiment came from a free weekly birthday card file which never did anything for me. I drew a rectangle around it and filled it in as well as the letters in Studio. I printed it on vellum.

  This is washed out a little color-wise in the photo but I wanted to try to show some of the shimmer and glitter. Unfortunately I never could really do this card justice taking photos. Both the green and the pink triangles are cut from DCWV cardstock. The pink inner card and the green are from their The Shimmer Stack. The pink glitter triangle is cut from their Street Lace. I'm pretty sure both of these pads are discontinued. I had not used the glitter cardstock cut setting in Studio and was pleased that it cut the DCWV glitter cardstock perfectly. (Even with a well used blade) In the past I had a hard time cutting it cleanly and clear through.(I'm a happy camper as I have several pads of it I bought a couple of years ago.) For the butterflies I wrapped magenta Karen Foster Scrap Floss around them to make their antennas and pop dotted them onto the card.

I hope "Bug" will enjoy her card and her book when her birthday rolls around.

Off to enjoy the sunshine while it lasts. Wishing you Happy Frugal Crafting till we meet again!

Wednesday, October 23, 2013

Interlock Magic Thanksgiving Card

Recently I checked out of the library "Handmade Greeting Cards" by Maureen Crawford. When I was looking through the catalog there was no image of the book cover but I didn't think I had checked it out before. I had not and although it is a thin book less than 100 pages it is full of ideas and tips. The interlock magic card is one card featured in the book. I looked at the diagram and although I never took geometry in school figured I could make my own cutting file of the semi-circle one. The interlocking jigsaw one might be a little more challenging but I think I can do the Christmas one in the book.
 This is the inside. . Notice the quarter circle on each end. That is what allows the card to interlock. I went ahead and stamped with gold ink the edge on the cut side. The stamp is "Five Bold Leaves" by Hero Arts. I just bought it last week at a thrift store for $1. Along with some single Hero Arts Leaf stamps for the same price each. :-) They are probably retired stamps but that is all right with me.

I used double sided card stock I bought at Dollar Tree last year. I love the tapestry look of the elk image. Alas though it has a large white area where  there had been a border. Although Dover Publications also had it with the border I did not care for the border. With the knife in Studio I cut off as much of the white that I could without cutting off the bottom elk. I was left with a small rectangle of white. I used the offset function in Studio to make the frame.

With the knife I cut the Happy Thanksgiving off of a page of graphics to make the tag which covers the rectangle. I drew a round corner rectangle around the image and then did an offset. For some reason Cameron kept cutting things off. I ended up having to place the elk image clear in the middle of the page to get it to cut right. After trying to cut the tag out five times and it not cutting right I hand cut it. Think it is time to roll back to a previous version of Studio where I did not have this problem. After the tag was cut out I inked the edges with red gold ink.

 I decided to go ahead and glue the tag so that it was off the image to add a little more interest. I pop dotted the image with tag onto the card base. Then I went ahead and trimmed the tag flush with the card. In graphic terms it is called bleeding.

 Good thing I'm a patient person because not only did I have to print and cut the images several times but I also had to take the picture of the outside of the card several times before I got both a good picture of the elk image and the gold stamped leaves.  Of course I'm looking at this image thinking it would make a nice masculine card for other occasions. :-)

One Thanksgiving card done and a few more left to do. Good thing Thanksgiving is going to be late this year. LOL!

Thank you for stopping by. Do come back as I plan to be making more cards using the ideas from this book. As well as perhaps make some decorative papers and cards from a couple of other books I checked out.

Wishing you Happy Frugal Crafting till we meet again!

Saturday, October 19, 2013

My Take On Pasted Dylusions Halloween Cards

The Pasted Dylusions technique is in this month's Technique Junkies Newsletter. The only problem is although the technique looks like it would be a fun one I don't own any Dylusions ink spray. The technique also uses metallic embossing paste. I don't own that either. As much as perhaps I would love to buy these products my goal for this year has been to use what I have already on hand. O.K I will confess I've been seriously looking at knitting looms but this is something my grandchildren could have fun with also. This is my take on the technique.


I have no idea where this pumpkin image came from but I saw it on my computer and thought it would be fun to make a card with it. I did a print and cut and then made a copy of the cutting lines to make my card stock stencil.  It printed a weird color so I used chalk on it and then used Mandarin Orange  Perfect Pearl. You can't really see the shimmer in the photo. 

I have moulding gel but it dries clear and wasn't exactly what I had in mind when I bought it. However, I decided to see if I could mix some acrylic paint in it. With a plastic card I applied the gel mixture. I made a couple of goofs with the gel but a couple of print and cut images covered those up. By the way have I told you I love my Cameo and what I can do with my machine. It amazes me how nicely small embellishments cut out. Using the Studio software I detached the witch spider from her web.

Once I discovered that the gel worked I went ahead and sprayed my card stock with a couple of Mister Huey color mists. I love how it turned out.. When the card stock was dry I went and used my gel mixture with the stencil again. When mixed with acrylic paint the gel mixture takes longer to dry so I could use my card stock stencil. When I had tried with just the gel previously the card stock stencil had stuck. :-(

These are the last of the Halloween cards that I need. Don't know what I will do next. I'm thinking of collecting some leaves and making a leaf print background for a card. I also want to try a couple of cards I saw in a book.

Thank you for stopping by and leaving comments. Wishing you Happy Frugal Crafting till we meet again!

Friday, October 18, 2013

Reverse Background Halloween Card

When I saw this technique in the Technique Junkie newsletter I knew I wanted to try it. Just wasn't sure which direction to go. I finally this week decided to go with a Halloween theme as I need a few Halloween cards. But it had to be something which would go through the mail without me paying extra postage.

The background is stamped using a Ditto stamp named double vision. I used Tim Holtz Distress Vintage Photo ink I don't know who designed the spider web but I think it was someone on the Silhouette Plus forum. It doesn't really show in the photo but I used a clear glitter pen. The pumpkin was from a image which I just traced around in Studio to get the pumpkin shape. It also is stamped with the Ditto stamp but I used a white pearl embossing powder on it. I painted distress ink over the embossing. The Halloween is an image from Dover Publications. You may have remembered seeing it on my "magic" card. On the inside I put the spider web with the witch spider. Another image I also used on the "magic" card.

Today felt more like a Spring day than a Fall day as the sun shone brightly and it was warm. I walked to the library to pick up a novel on hold and lo and behold a card making book I had placed a hold on had finally made it to my local library. Between that book and a few books on making decorative papers look for some more inspiration in the future. In the meantime thank you so much for stopping by and do come back.

Wishing you Happy Frugal Crafting till we meet again!

Friday, October 11, 2013

Magic Halloween Card

Hi Myoriah here today to share with you a Magic Halloween Card. For those who belong to the Silhouette Plus Forum I still have hair. LOL! Once I figured out how to do this card it was easy and it really is magic as you will see from the photos. Go grab yourself a cup of coffee and prepare to be enchanted.

Doing the ribbon is a real pain and you will see from my photos that I got it too loose on the crisscross. Next time I will go and use card stock for the strips like in the tutorial that Nick made. It will be a lot easier. All images are from Dover Publications I just did a print and cut for the separate single ones. Shh! Don't tell anyone that I didn't use a single stamp. I might have to use my name stamp on the spider panel.

Sorry I accidentally cut off the bottom of the card with my camera but I was afraid that I would not get the glitter to show again on the ghosts if I retook the picture. I started out using double sided card stock that I bought at a Dollar Tree store. I figured this orange would be perfect for a Halloween card. Alas although Cameron was set to cut to the edge he didn't so I had to trim both cards so that the fold was in the center. The cutting file is super easy to make as you will see when you watch the video. Of course if you wish you can always buy the template from Green Sneakers.

I edged both cutouts with Vintage ink to give a little bit of dimension. I then used a glue stick on part of the ghosts and sprinkled Martha Stewart crystal glitter. The pumpkin with the ghosts is pop dotted.

 This is the inside of the card. The ghost image actually has a secret message which will be visible in the last photo. My images could have been a little longer and I did think of adding a border at the top and bottom of them. I did manage to put the image so that you have one or both eyes showing on the crisscross side. The Halloween was glued onto the image. The image did not come with it but I thought it was cute. Just make sure you do not get any glue below the image if you add anything as you do not want the image stuck to the card stock or the magic won't work.
This is the back of the card or maybe it is the front. LOL! I traced the spider with my clear glitter pen but it does not show up in the photo. I just couldn't resist this cute spider and hopefully it will not gross out my granddaughter who is afraid of spiders. LOL! You will never catch her rescuing a spider and placing it outside or letting a spider live in the house.

This is the inside of the card. Notice how the images are now in reverse position and a message is revealed. Just ignore the childish printing. Now you know why I do everything on the computer. When you close the card you now see the pattern front again. Of course you could always do both fronts the same and use solid card stock for it to really look like magic.

Here is the link and video for how to make a magic card. I thought of doing a tutorial but this video is so well done. If you do not want to buy the template from Green Sneakers a inch slit is about right for the top and bottom. http://www.greensneakers.com/videos/A2-magic-card-template.html


This is a really fun card to make and the person who receives this card will think that you are a Magician. If you don't want to make a greeting card you can use this same process and make a Magic Card to wow your friends with. When I was growing up I had one I would put a dollar bill in and show my friends. They never could figure out how I made the dollar bill change positions. LOL!

If you decide to make a magic card  please come back and leave me a comment. I would love to know how it went.

Thank you for stopping by and do come back. I'm not sure what I'll be doing next but it might be a technique from Technique Junkie newsletter.

Wishing you Happy Frugal Crafting till we meet again!


Tuesday, October 8, 2013

Happy Birthday Waterfall Card

Welcome to Crafting The Frugal Way. I was watching Saturday a show where a waterfall card was featured. I had tried to make one before but just could not figure it out. After watching the show I saw what I had done wrong. I spent a fun day making my card.

Instead of showing you pictures I decided to try my hand at a video. Sorry about the quality but I was holding my camera with one hand and trying to show the card with the other.. Also the light is terrible but at least this gives you an idea of the card.
The cutting file for this card can be found at the Silhouette Plus Forum. Sweet Debbie who is the administrator of the forum generously shared the file. It may be available also through her blog Paper Pulse I'm not sure. I won't go into details of how to make the card because there are several videos at Youtube which show how.

I did a print and cut for this card. The images are from http://cajoline-scrap.blogspot.com/. When I saw them I knew they would be perfect for a birthday card.. I love how easy it is to layer images in Studio. I took one image for the background and then layered the fairy for one panel,the sundae and spoon for another, and of course the birthday cake.

It was suggested that brads be used to adhere the horizontal strip since just gluing the strip down at the sides might not be sufficient. I was looking for some small decorative brads I have but couldn't find them. Then I remembered seeing where someone had glued dimensional stickers on a brad. The small flowers I had were perfect for this card. Of course with adhesive squares you could always make your own dimensional shape.

The woman on the show did the pull a couple of different ways but I decided to do it my way. I took two buttons and sandwiched them between the pull strip. Then glued a gem on top. This makes a nice place to hold on to pull the waterfall.

I decided to stamp a greeting that would show when the strip was pulled. I looked at all my old birthday stamps and decided to go with the one with balloons. I knew it would fit on the strip but wasn't sure about the others. I went ahead after stamping and colored the balloons with colored pencils.

There you have it my waterfall card. I had so much fun making this card that I think I may make a couple of Halloween cards using this technique.

Do you like to make interactive cards?

That is all for now. Not sure what I'll do next but do come back.

Wishing you Happy Frugal Crafting till we meet again!

Sunday, October 6, 2013

Welcome Autumn

Hi there! Can you believe it is already Autumn here in the Northern Hemisphere. Boy has this year really flown by and  at least for me been a busy year.

 My new apartment entrance is an indoor entrance and the management will allow us to hang a wreath using a wreath hanger for Christmas but otherwise there is to be no personalizing outside our front door. I do have a patio which people see in passing but I wanted a way to welcome people who may come to visit. So I decided to make a welcome banner.

First off though I want to share with you that a good friend bought and brought over an Ikea shelving unit and desk for me. He even put it together while he was visiting. I'm a loving my new desk and slowly I'm beginning to get things unpacked and organized. I doubt if it will stay this clean for long. LOL! On the desk is the banner in process.

Originally I had planned to hang the banner between the living room and kitchen. However,a pushpin would not go into the overhang and for some reason tape was not holding it up. So I decided to hang it on my screen divider with tape. I found this screen divider recently at a second hand store and could not pass it up. The panels are covered with fabric.This is the view from the front door as you enter.

I don't think I'm done with the banner yet.  I have been thinking of adding some fabric leaves if I can ever find them. LOL! They are packed in one of the many boxes stacked in my craft room. I also may add some leaves I cut out which were filled with the leaves background. Otherwise they will be find their way for another project.
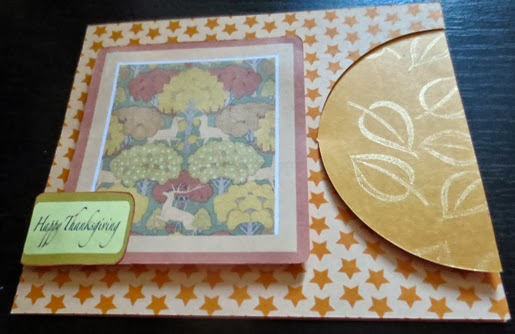
I decided to use the tag shape from the Silhouette Studio library. I did an internal offset and filled in with a leaf background pattern I created years ago from a photo of a pile of leaves I took. 

The leaf was a free shape from the Silhouette store and had a wood-grain heart which I deleted. I filled it in with a gradient color. I don't remember what font I used for the letters.

Like most projects this one evolved the longer I worked on it. First for the letters I brushed gold and red glitter glue on them. Then I decided to edge the letters with glitter glue. I wasn't sure I had enough of the gold so I alternated the colors.

The leaf shape that I planned to put the letters on looked blah to me. I decided to stamp the leaf using my Stampendous Foliage cube stamp and Stazon Rusty Brown ink. I rotated the cube while stamping and in some places did some over stamping. 

The first time I saw this stamp I totally fell in love with it but didn't have the money to buy it. I went back when stamps were on sale and it was out of stock. Luckily the next time there was a sale not only was the stamp in stock but I was able to use a coupon. If you wish to add this stamp to your collection I've added a link. I'm sure you can also find it at other places. 

I was just going to edge the vanilla mat with Brilliance Rocket Red Gold ink but was having so much fun with my foliage cube that I ended up stamping that shape also on the front and back. 

I decided to go with the orange ribbon as it really made the colors pop. I love how this little bit of color has made my apartment appear warm and inviting. I may decide to hang this banner with paneling nails in between the two rooms like I had planned or it may stay on the divider until time to replace with a Winter Welcome banner.

Next is to add some stamped leaves and pattern leaves to a lampshade with some removable double sided tape. May even trim the lampshade with some ribbon.

Do you decorate for the seasons?

Wishing you Happy Frugal Crafting till we meet again.