- a napkin,paper towel, facial tissue or newsprint. Different papers produce different effects. As well as how heavy you apply the gesso
- foil
- gesso
- foam brush
- optional is watercolor,ink,food dye, acrylic paint,Diamond Glaze, Pearl Ex, etc.
Lay your foil out on your work surface with your paper on top. It doesn't matter if the foil has wrinkles in it. In fact you can recycle foil that you have wrapped non messy items in .If you are using two ply paper you would separate at this point if you wish. I usually separate paper towels because they are heavier. That way I can get two pieces of faux paper. Depending on how heavy I apply the gesso I can get some interesting looks.
In the past I have added soap dye or reinker to the gesso to tint it but today I am going to leave it white. You can also find gesso in black and perhaps in other colors I don't know.
Here I am ready to begin you can use any Gesso.
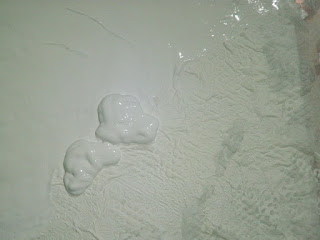
Put a big dollop in the center and work your way out. Always work out.
If your paper should tear don't panic
Add a paper patch and apply gesso over it
I like to very lightly swirl my brush through the wet gesso. They won't show though when dry.
Now the waiting game begins. You want to make sure it is dry before adding the finishing touches to it. I place a heat lamp over it to help in the drying process. Still plan on it taking several hours to dry. Depending on the weather and how thick the gesso is applied it may take eight hours or more.
Now it is dry and no longer glossy. You can see the ridges from the wrinkles in the paper and foil.
Now the fun. I like to use watercolors in tubes as I can squeeze them on. You could use acrylics but I'm using metallic watercolors here. You can use ink instead of paint. You can add Perfect Pearls to water and paint that on. You can make a glaze out of Diamond Glaze and acrylic paint or instead of the paint Pearl Ex. (I have not tried my Dimensional Magic and paint so I'll have to get back to you on whether that will work. Same with Dimensional Magic and Perfect Pearls.)
With a damp (not sopping wet) brush I blend the colors together and squeeze more from out of the tube.
I keep blending and mixing until I get something I like. No two pieces ever come out the same. Notice how the addition of color has caused the texture to really pop out.
Now it is waiting again for the paint to dry. You can speed up the process with a hair dryer. Once dry you can leave it like it is. Do make sure it is dry. I had to go and do some touch-up after taking the picture.
You could crumple up the paper first and smooth it before painting it. After the paint dries you can crumple it up and then brush acrylic paint,ink,etc. over it. I like this the way it is so I'll be leaving it this way. Besides I don't want to risk messing up the paint.
Here is the card I made using the texture paper as a background. If you fold your paper over card stock like I did here the gesso may show through where it is folded. Since I was using a frame it was no problem. The flower is a print and cut. I love how I can extract an element from an image in Studio.
I have not tried to cut my faux paper out with a die or punch yet. You may want to experiment.
Have fun playing with making faux sculpted paper. I'm sure you will see more of this sculpted paper used in other projects.
Thank you for stopping by. Do come back because you never know what mysterious,mad thing I may be doing next. LOL!


No comments:
Post a Comment
Thank you for taking the time to leave a comment. :)