Wednesday, November 30, 2011

What Is It? Ornament,Gift Box,Luminary?

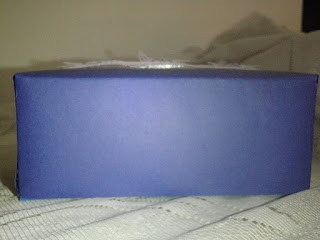
I saw this cute cube at the Silhouette store. *sigh* I didn't see the snowflake one until today and they are back at $.99 cents. I plan to make a bunch to use as a garland. A friend of mine showed me how it could also be used as a luminary. LOL! Now he wants me to make a bunch for him to give as gifts. I am going to use a tip for score lines found on the Silhouette Plus forum as I don't like the perforated lines.

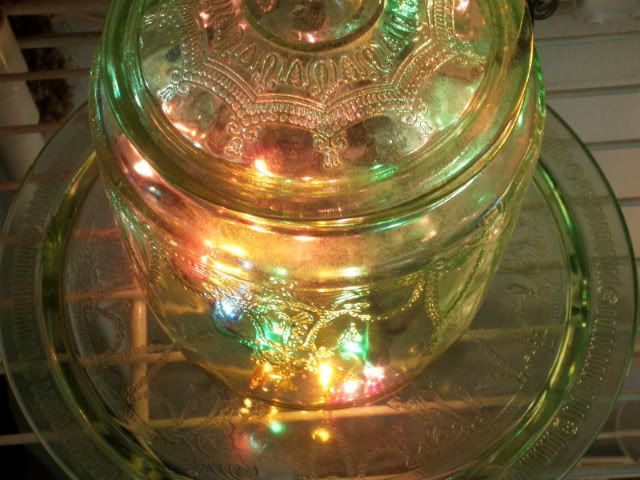
Wouldn't these be cute on a Christmas tree with battery tea lights in them. The tea light in the picture actually changes color. I love it!

This one I lined with tissue paper and put a small gift in..The recipient can hang it on their tree and use it as an ornament for years to come.

If you don't have a machine that uses the Studio software you can probably find a template for the cube. You could then cut out your design with a craft knife. It will be a little more work.

Hope you enjoyed visiting my blog. Do come back and who knows I may eventually get around to making a Christmas card or two using playing cards to share with you. LOL!

Here's wishing you a fun filled rest of the week crafting.

Tuesday, November 29, 2011

Button, Button Who Has The Button

Looking for stocking stuffers for a girl. If she has long hair she may like a button ponytail holder. They are really easy to make. Of course you can make these for yourself also.

Sorry I took pictures while I was making these but forgot to put the the memory card back in the camera. I have not figured out how to transfer pictures from the internal memory to my computer.


I kept looking at these buttons every time I went past them in WalMart wondering what I could do with them. Well today in WalMart I bought them. I already had the ponytail holders left over from my working days. My granddaughters have been wearing their hair in pigtails and braids so I thought these would be perfect.

To make these you will need shank buttons. The bigger the shank the easier it will be to pull the ponytail holder through it. Some of the buttons that came in the package the shanks were too small and I'll save those to use on cards or other projects. Making fabric covered buttons to use for this project would be cute. I also saw some beautiful metal shank buttons that I'm thinking of buying for myself.

This just happened to be the size I had of hair elastics but you could use whatever size you want. The tricky part depending on your shank size will be to thread the elastic through the shank. I used a large needle to help poke it through. Once you have it pulled through  about halfway you are going to slip one end through the loop of the other end. You will pull it tight and you are done. Easy! My type of crafting.

Besides using buttons in sewing how do you use buttons?  Do you make your own stocking stuffers? What type of things do you use for stocking stuffers?

I am going to try to find time this week to make Christmas cards using playing cards. So don't throw those deck of cards out that has missing cards. LOL! Do come back to see what I do with them.

Monday, November 28, 2011

Let It Snow

One of the things I love to do is to make cards. My granddaughter loves popup cards so I was excited when in the Silhouette Shape store I found this snow flake popup card. It was on sale for $.50.

 I take advantage of buying shapes when they are on sale for $.50 and this weekend all shapes were. If you are using a machine that uses the Studio format of files I encourage you to take advantage when there are sales.

Although the snowman I did for the front of the card was another Silhouette file you could find a similar one to cut out by hand if you don't have a machine.

For this snowman I used goggly eyes which are relatively inexpensive. I colored the boots,hat,branches and mittens with gel pens. For the mouth I cut it out and glued a scrap of ribbon on the wrong side. The buttons are I Rocks and you really get a lot of  different sizes in a container.The ribbon on the hat is a scrap that was too short to make a bow. If the scarf looks familiar it is because I knitted it from leftover yarn from knitting a hat. Of course he had to have some glitter so that he looked more like he was made of snow. I doubt if I even have $.50 worth of supplies invested in this snowman.

It doesn't show up but the card base is a shimmer card stock.  I buy the card stock pads when they are at least 20% off. I have large enough scraps left over for another project. It is always fun for me to see what I can do with left overs.

If you have priced elements for paper crafting you know that they are not cheap. So if you can make your own you will save money.  I know I did making this card. Oh and the snowflakes on the front are the cutouts from inside.


What type of embellishments do you use? How would you deck out this snowman?

Wishing you a fun filled crafting day. Hope you are having fun getting ready for the holidays. 

Friday, November 25, 2011

Poor Woman's Peeled Paint

This is a wonderful  Christmas card using a peeled paint technique I had never heard of. It uses Acrylic paint,tacky glue,and a embossing gun.

Scrap Time - Ep. 696 - Peeled Paint Technique Christmas Card featuring Eco-Green Products from Mark Giles on Vimeo.

My tacky glue was all dried up but I discovered that Elmer's worked fine. I brushed it over my base coat and went and washed my brush. When I came back I brushed the top coat and used  my embossing gun. In places some of the paint had started to separate before I even used my heat gun. I had one place where the paint  really bubbled up but I carefully pushed it back down. This is not really a crackle finish.  However I like the way it turned out. I used a scrap of watercolor paper to try this and it did not buckle at all. By the way when I do anything like this I have a fire extinguisher close by. I have never needed it but I would rather be safe than sorry.

If you try this let me know how it worked for you.. Stay tuned as there is more to come.

Thursday, November 24, 2011

A Handmade Christmas

I used to start in January making gifts for Christmas. I never realized how much these homemade gifts meant to people until recently.

 I went to visit my son and he still has the rocking horse I had lovingly stained and coated with polyurethane when he was two years old. At the time the unfinished wooden horse cost a fortune. LOL! I had to borrow the money from my mother-in-law to buy it.

I decided since I retired to start making some gifts last month. In  previous posts I showed the headbands I made as well as Fritzi the frog hair clip.


I also made this darling pendant for one of my granddaughters. I printed  the image on frosted Shrink Plastic (print on the rough side) and cut it out with my Cameo but you could also cut  something like this out by hand. Or if you have a die cut machine and a die you like you could use that.  Just remember if there is words to mirror your image before printing. While still hot I sprinkled embossing powder on the printed side to give it shimmer. Under a dollar for the Shrink Plastic which I used the scraps after cutting out for snowflakes for the head band. I went to my local bead shop and the cord cost me a dollar and the owner put the cord on for me  at no charge and made it so the cord can be adjusted different lengths.


I have a pompom left to make for this knitted hat for another granddaughter. It had been ages since I've done any knitting. Under $4 for the yarn and I have yarn left over to knit head bands and knit flowers for embellishments. I love the colors and the pattern that the variegated yarn created.

I have a lot more  projects to do and hope that I can get the gifts to be mailed finished by next week.  I would like to also get my cards made and mailed by the first.

I don't plan to do any shopping on Black Friday but on Saturday a place where I shop has a coupon for 30% off all my purchases including sale items. I have one gift to buy of something I can't make. Otherwise it will be a handmade Christmas.

Wishing you the best of luck if you go shopping Black Friday or Cyber Monday. Come back for an interesting painting technique tomorrow.

Tuesday, November 22, 2011

It's All In The Box

I have a confession to make. I do not like to wrap gifts. I think it is a holdover from the days when I was the official gift wrapper. Growing up I even ended up wrapping my own gifts and most of the time I knew out of all the gifts I wrapped which ones were for me.

Not only is the gift important but also is the presentation. At least I think so. Here is a box I made for my granddaughter's birthday. This was a free cutting file from the Silhouette store. I cut this using my Silhouette SD. The Angel on it is a Print and Cut. With the Silhouette machines and software you can make beautiful Print and Cuts using images you have. The flowers are ones I cut out to make my own patterned card stock with my faux glimmer mist. See previous post for details. The ribbon is from a Dollar Tree store. My favorite store to pick up ribbon inexpensively.


 Here is the box I made for the headbands. It is the perfect size for putting four headbands in.


This size box uses two pieces of 12x12 card stock. The pattern for this box can be found here:http://www.theprojectgirl.com/category/organization/free-download/page/5/ You will have to scroll the page to find  the free file. For those who do not have a cutting machine there is a PDF template to use. 

I cut this with my new Cameo by Sihouette but was having some problems with the mat slipping. It took me four pieces of card stock before I got the top and bottom cut out. I was afraid to get into my stash of fancy papers to make this box. By the way the Designer Edition of the software makes it so easy to use files in the SVG format. LOL! Just need to remember to turn on the cut lines.

Yes that ribbon is the same Dollar Tree ribbon I used for the ribbon roses on the headband. Just a different color. I love the glitter. Sigh! Alas they were out of it the other day when I went into the store. I glued on top of the ribbon a paper mat which I had cut out and put in my stash awhile back using my Silhouette SD machine. You could use a paper doily or if you have a cutting machine cut your own mat for on top. Of course I have to have a little bling and I also have fun playing with my I Rock tool. So rhinestones were added.

I am knitting a hat for my youngest granddaughter and I think this will be the perfect size for it. I want to see how my Cameo cuts out some wrapping paper I have as I think a box with the wrapping paper glued on it would be so cute.

I also made a box for a necklace I crafted for my oldest granddaughter out of shrink plastic. I could not get a good picture of the box itself without shadows and glare on a sticker I made decorating it but thought I would share Fritzi the frog.


I tied ribbon under the lid  of the box so I could attach a hair clip to it. Fritzi the frog is a free SVG file from SVG Cuts. I re-sized him and cut him out of thin craft foam using my Cameo. Unfortunately I only had white foam I bought from Dollar Tree. So I smeared glue on the foam and sprinkled green glitter. The eyes are I Rock rhinestones.The foam melted a little bit  while I was applying them so the eyes are a little sunken. I felt like he needed something so cut a piece of red ribbon into a tongue. It curled up a little bit using a pencil to curl it. Fritzi was attached to a hair clip from a package I bought at a Dollar Tree using E600 glue. The clip holds the name tag.

By the way if you do not have a cutting machine but would like to use SVG files as templates you can download Inkscape for free. Inkscape will open SVG files and you can either print from there or save them in another format like the png one.

Oh and if you have a Dollar Tree store or something similar you may be able to find a roll of foam. This is great for making your own hair clips,embellishments on cards and scrapbook pages,ornaments,etc..  Over the weekend  I found a roll of green. Looking forward to making a pin out of it as well as some ornaments.

How do you embellish gifts? What type of decorations or extra little gifts do you add?

For  those who celebrate Thanksgiving have a Happy Thanksgiving! Thank you for visiting and be sure to come back.

Saturday, November 19, 2011

Faux Glimmer Mist

I know I said I was going to post about boxes but I do not have pictures yet and it has been too dark to take good pictures.

Thought I would share how to make your own glimmer mist. I tried doing what is in this video only to have the mister clog. Do not do this in the Ranger's mini misters. Also make sure you use the warm water as everything mixes up better.

I ended up buying some misters which artist use for painting and they worked a lot better and also larger size. Although this video talks about using Mod Podge I have done this without it. However, if you decide to add the Pearl Ex that is mentioned you will want to use the Mod Podge as it is a binder. Personally I prefer using Perfect Pearls which is cheaper and once mixed in water binds.


 I usually paint this mixture on paper and cutouts instead of spraying.  I have made some beautiful designs that way. If your projects curl you can either iron them flat after they dry or use a embossing gun while they are still wet.

 If you don't want to mess with paint you can use water and Perfect Pearls. This is my preferred method for a spray. I have added soap dye for color because that is what I have left over from my soap making days and gotten some nice effects that way. I have used the Perfect Pearls by itself as well as mixed alcohol ink with the Perfect Pearls. I have not tried food coloring yet only because I don't have any but that might work also.

 I buy the Perfect Pearls with a coupon and it is cheaper to buy it without the brushes and medium. That is if you can find it that way. Although the Perfect Pearls may seem to be expensive there is so much you can do with it. I will show some projects in a future post of some of the projects I have used Perfect Pearls with.

This is card stock that I  put flower cutouts on and sprayed using my soap dye and Perfect Pearls in a mister. Sorry the picture doesn't really show the glimmer that much. Not only did I get a pretty piece of card stock but also got pretty flowers to use on projects. By the way I do my misting in a box in a bath tub easier to clean up the mess that way. LOL!

Have fun and let me know what you are going to do or have done with faux glimmer mist. If you have a recipe for faux glimmer mist I would love it if you would share it.

Stay tuned as I really am going to post about boxes. LOL!

Tuesday, November 15, 2011

Headbands Are In!

I was looking for inexpensive gifts which were also lightweight to send to my eldest granddaughter. I discovered that headbands are still in fashion. I surfed the web looking at different designs and pricing them. That is when I decided to make my own. So it was off to doing more surfing for DIY headbands. Then it was off to a dollar store. I bought six narrow fabric covered headbands for $1. Then using what I had on hand already made the headbands.


If you are looking for a gift for a girl don't forget that headbands are in. Which headband are you going to make? Are you going to make a romantic vintage looking one or perhaps a seasonal one? Are you going to make a headband for yourself?


These are just a few ideas. If you have a headband you don't like or find a plastic one inexpensive but you don't like color you can change it. Wrap the headband with ribbon or following the directions in "The Complete Photo Guide to Ribbon Crafts" you can create a fabulous woven headband. This book also has some other wonderful ideas for using ribbon. Check it out from your public library.


Below is how I made these headbands. I will try to find links to add here for making the lace flowers and ribbon roses or post in another post instructions for them.


The black headband has a lace flower.  Lace flowers are easy to make and there are several sites with instructions for making them. It is topped with a button with a jewel glued on top. 


For the blue headband I took wide sheer wire ribbon I bought at a dollar store and cut in half approximately 12" lengths.I then made ribbon roses. So each length of ribbon you can make two roses. There are several sites with tutorials for making ribbon roses if you don't know how. Believe me they are really easy to make and can even be made out of crepe paper or strips of paper for other projects. 


The braided one was the most fun to make. I took three different colors of narrow ribbon which I had bought for fifty cents a roll. I cut a little over a yard as I wanted my granddaughter to be able to wear the headband on her forehead and tie it in back if she wanted. I pinned the ribbon to a scrap of Styrofoam to braid it. Cut the ribbon 6" longer than you want the finished braid to be.


The white headband has shrink plastic snowflakes glued on it. I bought over the summer Tim Holtz's Winter Wonderland die at a sidewalk sale for $5. I used scraps of shrink plastic from other projects. Using my I Rock tool I adhered the rhinestones. 


Come back next week and I'll post a box which is the perfect size for these headbands. Of course the box can also be used for other things. LOL!


Tuesday, November 8, 2011

First Post

Welcome to Crafting The Frugal Way. This is not only my first post but also my first blog so I hope you will bear with me as I learn the ropes.


My goal for this blog is to share ideas for crafting without spending a lot of money. I will admit that I have spent a lot of money on certain tools but they earn their keep. I will also admit that I have wasted money either on buying tools on impulse or not doing the research on what I'm buying. 


Although the title is Crafting The Frugal Way there may occasionally slip in a post not related to crafting but frugal nonetheless. 


I've been known to make every penny squeal. Just ask my family and they'll tell you it is true. LOL!


Stayed tuned because with Christmas just around the corner I hope to share some frugal ideas with you. Also I would love to read some of your frugal Holiday ideas. What are some of the frugal gifts that you make to give?