Thursday, June 19, 2014

Wallpaper Panel Card

Good day! Hope all is well in your world. My laptop keyboard died on me yesterday so I had to resurrect my old computer with Vista on it. It is always nice to have a backup. :-)

Several months ago I bought a roll of texture wallpaper at a thrift store. I happened to find a roll with panels which are almost the perfect size for a standard 4 1/4 by 5 1/2 card. I was going to color it with watercolor paint until I bought myself gelatos. I'm having so much fun using them along with the Inka Gold that I found in a clearance aisle.Reminder to self don't forget to check out the clearance aisles.

This is what it looks like still on the roll. There are lots of different patterns out there this just happened to be what the thrift store had. I'm too cheap to pay full retail price.


And here is my card


I used Inka Gold for the outside trim of the panel. Where the blue is I wet a brush and wiped it over the gelato stick and then brushed it on. The green was scribbled on and the blended with my finger. Using a wallpaper panel like this makes for a quick card.

Thank you for stopping by and leaving comments. I am off to finish packing craft supplies for a play date with my sister. I'm so excited. Wishing you Happy Frugal Crafting till we meet again!


Sunday, June 15, 2014

Twins Quick Cards

Hi readers Roni had on her blog back in 2007 some quick Christmas cards and I decide to try one of the ideas. Although instead of using scissors I used my Cameo. Also I decided to go more decorative.

Lol! I spent more time playing around to see if I could stamp with a combination of Inka Gold and a Gelato than I did cutting my twin panels and cutting out the stamped image with a die.

I started by cutting out my two rounded corner card bases. For some reason the first card base cut a little rough leaving some ragged edges so I decided to distress the edges with the edge of my scissors for both of them.

Then in the Designer Edition of Studio I drew a rectangle the size I wanted it to be. I then took the knife tool and the wave pattern to cut the rectangle into two sections. I decided to cut the wave pattern off center so one panel would be wider than the other.

I decided to go ahead and use some monotypes I had made on copy paper. The blue print was made using metallic paint and the butterfly stamp. I made that one last year on my homemade gelli plate. The green one was actually a piece of copy paper I had placed down on my round gelli plate to clean it. When I cut it I got the rounded edge in one corner but I like it.

Several people have asked me about the butterfly stamp because it seems to find its way onto a lot of cards. I must confess it is my favorite stamp. As well as the first non Christmas stamps that I bought. The stamp is by "Funny Business Stamp Company". They were a stamp company based in Seattle Washington but I could not find out if they are still in business or not. The copyright on the stamp is 1981 so I guess it could be considered a vintage stamp by now.

I decided to see if I could stamp with a combination of Inka Gold and a gelato. I knew that I could mix Inka Gold with water on a craft mat and then stamp but decided to see if I could apply Inka Gold directly to a stamp and spritz once with water and then stamp. Then I decided to see if I could color over the Inka Gold with the gelato and then spritz and stamp. I wasn't worried about contaminating the gelato because I knew it would wipe clean. My results varied depending on how heavy both the Inka Gold and gelato were applied as well as how wet. On the second butterfly I rubbed my finger over the stamp after I had spritzed it so it gave the stamp more of a water color look.


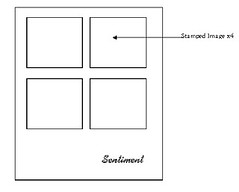
I cut out the stamped images with a Spellbinder die. Glued everything down and there you have it two quick cards. You might want to keep this idea in mind if you need to make a lot of invitations or holiday cards.Using two different pattern papers you could quickly make cards.

Thank you for stopping by. I don't know when next I'll post as I have some new goodies coming in the mail so I'll be busy playing with those. As well as I just might go and have a Play Date for a few days with my sister. I have all kinds of techniques to teach her and products to introduce her to.
Wishing you Happy Frugal Crafting till we meet again!

Wednesday, June 11, 2014

Card Sketch #1

Hi readers, yesterday was a good day for crafting. I started to walk to the park with the boys but the rain started and the wind really started blowing so we scurried home. I decided to finish coloring my stamped image with water color pencils and put together a card.

Normally I don't do card sketches but one of the things I've made for a goal is to challenge myself to do something I normally don't do. I started reading some of  Roni's old posts from her blog Ink Stains with Roni and she had this card sketch.
Using this sketch as a jump start point I came up with this card. You will notice that I decided to not go with rectangles.
 The first thing I did was create my cutting file. I started off by making a panel with the cutout ovals. Originally I was going to glue my plastic with the stamp image right on a blank card base. I decided instead though to make a corresponding card base. I didn't take into consideration that welding a cutout panel and a rectangle in Studio would make a slight difference in the size so the cutout panel and the front would not both be the same size. However, I like the way the inside panel peeks out on the front. Of course Cameron was happy to get to cut out the cut out panel and the card base.

To make the media for stamping on I took a piece of plastic and glued with acrylic floor wax a check napkin I had separated onto it. The napkin wrinkled when I put it onto the plastic but that was no big deal.When it was dried I placed my cut out panel over the plastic side using it as a guide of where to stamp and stamped in the openings. I could not find on the stamp who made it but it is an old rubber stamp I have had for a long time. Once the Stazon ink was dry I turned it over and colored in  the stamped image with water color pencils. Then I put my card together using a dot tape runner.

I stamped on a scrap on the napkin side my sentiment. Then cut it out free hand to fit. I could have just as easily stamped right on the card front but you know me I'm always afraid of messing something up when I stamp. Besides I think it pulls everything together.

I decided to add a fun detail to the inside panel by embossing it with  my Swiss Dots folder.

By using cutouts on the front and on the inside panel there is a stain glass look on the front.

Do you like to use card sketches when making cards? Do you like to use things like napkins which are usually throwaways?

Thanks for stopping by! Wishing you Happy Frugal Crafting till we meet again!