Sorry about not posting lately. I was having fun with my sis and playing tourist. I don't do that too often. Anyway I brought sun and summer home with me putting me in the mood to do a summer card.
I have had a sandal cutting file since I scanned it from the book "Homemade" and traced it into a cutting file. With the card challenge over at Silhouette Plus forum using glitter and shimmer I knew I wanted to use it. Also Moxie Fab World has their Tuesday Trigger using this summery image.
I love the colors and the sparkle of the sugar. To me this shouts summer and fun. Although I could not totally duplicate the colors I love how my card turned out.
Before you look at my card you had better put on those sun glasses. LOL!
Although I wanted to layer the colors like in the image I had to switch the colors around a little bit since I did not have a raspberry colored card base and didn't want to use my one and only piece of raspberry card stock for one.
I used a pre-scored orange card base for the card. I sprayed adhesive on it and then sprinkled coarse Martha Stewart crystal glitter. Although it doesn't show up in the picture the green is white card stock which I sprayed faux glimmer mist on. It does have a sheen to it. The raspberry panel I also used spray adhesive on and crystal glitter. The sandal was heat embossed with silver embossing powder. I've wanted to do it for a long but didn't have any silver until I visited my sister.
The sun was chalked with yellow chalk and then painted with gold Perfect Pearl. I tried to use the sentiment as a stencil but it didn't work. I decided to use silver glitter on a tag. Then cut out of yellow a tag with the sentiment. Then glued the tags together. I used a Karen Foster brad to attach it to the sandal. The sandal is attached to the card with foam adhesive.
I encourage you to join in the Moxie Fab World Tuesday Trigger at http://www.moxiefabworld.com/search/label/Tuesday%20Trigger You have until the 20th of May. Also the Silhouette Plus May card challenge is going until the end of the month.
My frugal tip is to use adhesive and glitter to make your own glitter paper. It is a lot cheaper and by using spray adhesive the glitter doesn't seem to fall off.
Thank you for stopping by. Do come back. Happy Crafting until we meet again.
Wednesday, May 16, 2012
Monday, May 7, 2012
Another Tuesday Trigger:Vintage Vogue
When I saw the Moxie Fab World Tuesday Trigger I just knew that I had to enter it. Even though I am no longer a ribbon and lace girl I do like to use those elements on my cards. This is the totally fabulous inspiration image.
I love that taupe dress and knew that I wanted that color in my interpretation. Luckily I had some pre-scored cards and there just happened to be a card close to that color. I love those gold circles also on a sheer fabric.Here is my card.
Well there you have my Vintage Vogue look. As well as a totally different color palette from my usual.
I hope you will hop over to Moxie Fab World and play along and feast your eyes on the awesome entries. This is opened until the 13th of May so you have time.
http://www.moxiefabworld.com/2012/05/tuesday-trigger-vintage-vogue.html
My frugal tip of the day is blog hop there are often some really great digital stuff for free.
Thank you for stopping by and do come back. I have a project in mind for the card challenge over at the Silhouette Plus Forum that I will be sharing next week. Happy Frugal Crafting till we meet again!
Thursday, May 3, 2012
Clowning Around!
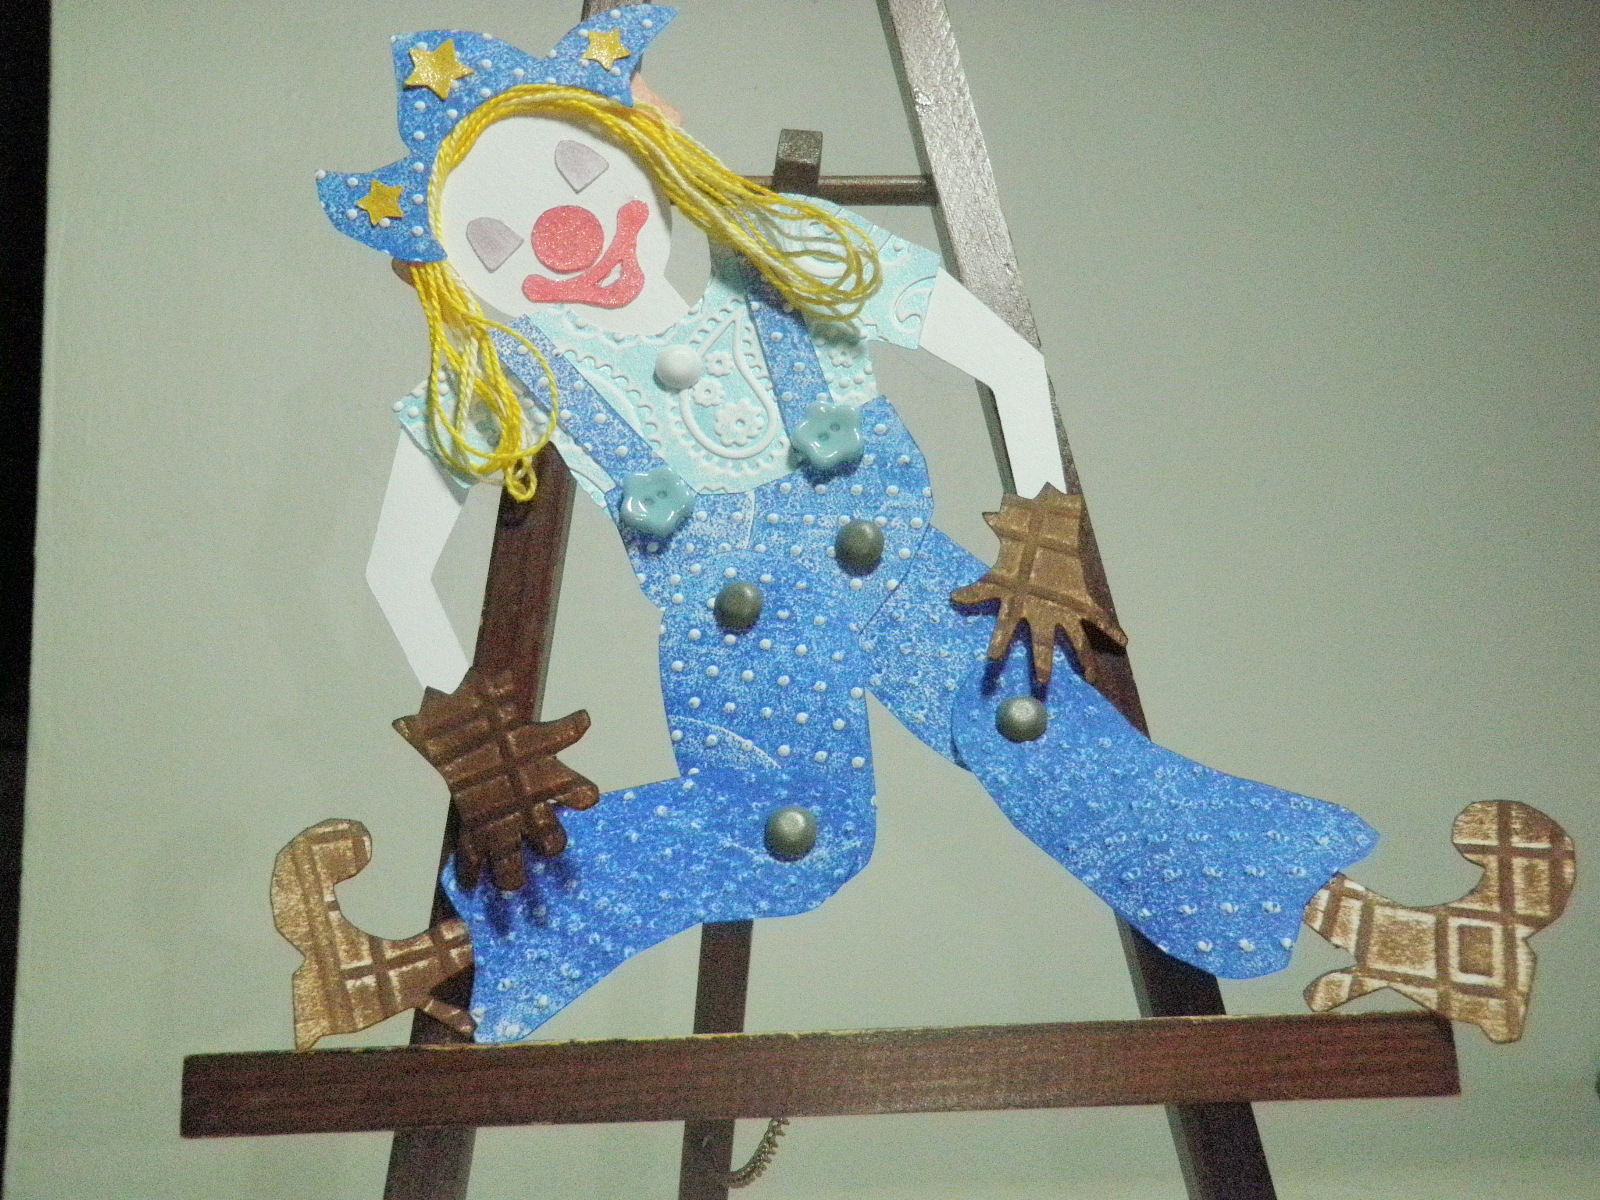
I find a lot of inspiration in books. Books that I check out of the library. Often these books have templates in them. "Card Making" by Sally Henry is no exception. Although this book is geared for kids especially beginning card markers would find it helpful. One of the templates was for making a paper clown.With some modification other characters could be made. In fact I have some ideas and the book shows part of a fairy,pirate,and robot.
For now though I'm making the clown with a few differences. I added hair for a girl clown. Who says girls can't be clowns. I wish I would have added brads to the arms so that they could be moved as well as the legs and head. She is done except for the eyes. I'm hoping tomorrow I can get to a craft store and that they will have small enough wiggly eyes. Otherwise I'll have to resort to using rhinestones which I color with a marker.
LOL! Just noticed the shadow of the hands in the picture. That darker color is a shadow. So what do you think of my girl clown?
The overalls was embossed with Swiss Dot embossing folder. The folder has a bad spot because I tried a canning lid in it as part of an experiment. In this case though I think it just makes the overalls look a little worn. I inked the folder on the recessed side before embossing the pieces. The shirt I used a paisley embossing folder and inked the raised side. The gloves and shoes were embossed with a texture plate and Vintage Photo distress ink rubbed over them. The ears were chalked. Nose,lips, and stars on the hat were colored with gel pens.. The eye area was colored with cheap eyes shadow I bought at a dollar store. The buttons are from G Studio. Don't know where I got the assortment of brads from. Was glad to see I had a white one which holds the head on and allows it to move. The legs can be moved into all kinds of fun positions.
Unfortunately I had not considered the size when she was finished so I'll have to pay extra postage but my granddaughter is worth it. I know she will love it.
My frugal tip of the day is don't throw out that old eye shadow. Use it in your crafting instead. Happy Crafting till we meet again.
For now though I'm making the clown with a few differences. I added hair for a girl clown. Who says girls can't be clowns. I wish I would have added brads to the arms so that they could be moved as well as the legs and head. She is done except for the eyes. I'm hoping tomorrow I can get to a craft store and that they will have small enough wiggly eyes. Otherwise I'll have to resort to using rhinestones which I color with a marker.
LOL! Just noticed the shadow of the hands in the picture. That darker color is a shadow. So what do you think of my girl clown?
The overalls was embossed with Swiss Dot embossing folder. The folder has a bad spot because I tried a canning lid in it as part of an experiment. In this case though I think it just makes the overalls look a little worn. I inked the folder on the recessed side before embossing the pieces. The shirt I used a paisley embossing folder and inked the raised side. The gloves and shoes were embossed with a texture plate and Vintage Photo distress ink rubbed over them. The ears were chalked. Nose,lips, and stars on the hat were colored with gel pens.. The eye area was colored with cheap eyes shadow I bought at a dollar store. The buttons are from G Studio. Don't know where I got the assortment of brads from. Was glad to see I had a white one which holds the head on and allows it to move. The legs can be moved into all kinds of fun positions.
Unfortunately I had not considered the size when she was finished so I'll have to pay extra postage but my granddaughter is worth it. I know she will love it.
My frugal tip of the day is don't throw out that old eye shadow. Use it in your crafting instead. Happy Crafting till we meet again.
Subscribe to:
Posts (Atom)