

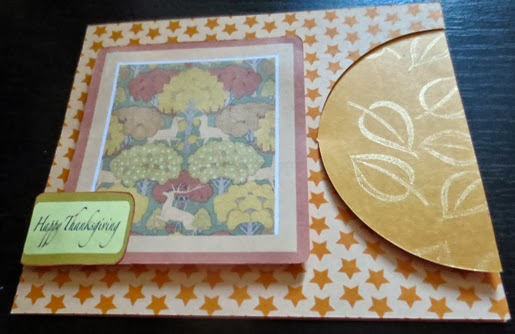
With the knife I cut the Happy Thanksgiving off of a page of graphics to make the tag which covers the rectangle. I drew a round corner rectangle around the image and then did an offset. For some reason Cameron kept cutting things off. I ended up having to place the elk image clear in the middle of the page to get it to cut right. After trying to cut the tag out five times and it not cutting right I hand cut it. Think it is time to roll back to a previous version of Studio where I did not have this problem. After the tag was cut out I inked the edges with red gold ink.
I decided to go ahead and glue the tag so that it was off the image to add a little more interest. I pop dotted the image with tag onto the card base. Then I went ahead and trimmed the tag flush with the card. In graphic terms it is called bleeding.
Good thing I'm a patient person because not only did I have to print and cut the images several times but I also had to take the picture of the outside of the card several times before I got both a good picture of the elk image and the gold stamped leaves. Of course I'm looking at this image thinking it would make a nice masculine card for other occasions. :-)
One Thanksgiving card done and a few more left to do. Good thing Thanksgiving is going to be late this year. LOL!
Thank you for stopping by. Do come back as I plan to be making more cards using the ideas from this book. As well as perhaps make some decorative papers and cards from a couple of other books I checked out.
Wishing you Happy Frugal Crafting till we meet again!
My dear Myoriah, Not only are you a patient person making cards but also taking the time to find such gorgeous stamps at a thrift store. I don't think I have ever seen any in our thrift stores. Great tutorial. You make a good teacher.
ReplyDeleteLOVE YOUR CARD and you have done a beautiful job on it.
Our Thanksgiving is all over with.
Going to have to check out that book.
Myrna
Myoriah is there any chance I could buy the cut file from you. I love the card you created,my email is bjperr2@gmail.com.
ReplyDeleteBlessings Jocelan
What an interesting card. Lucky you for finding the book at the library and for finding stamps at the thrift store.
ReplyDelete